

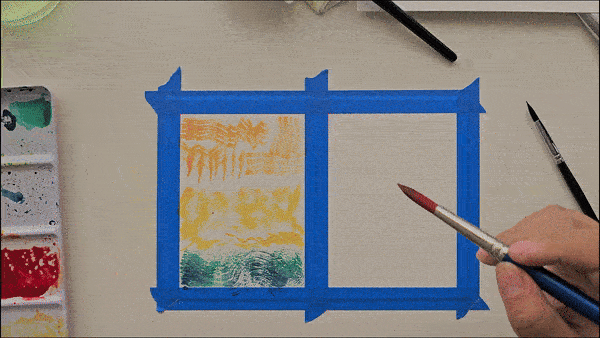
Basic Techniques
Flat Wash
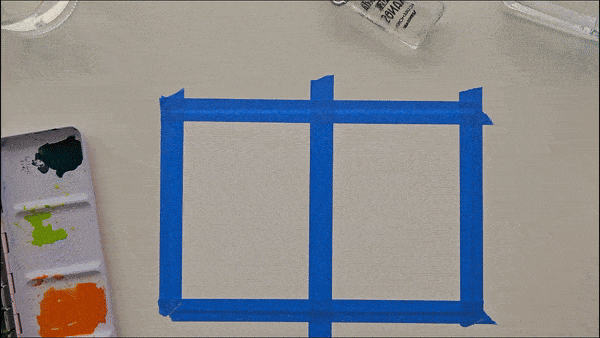
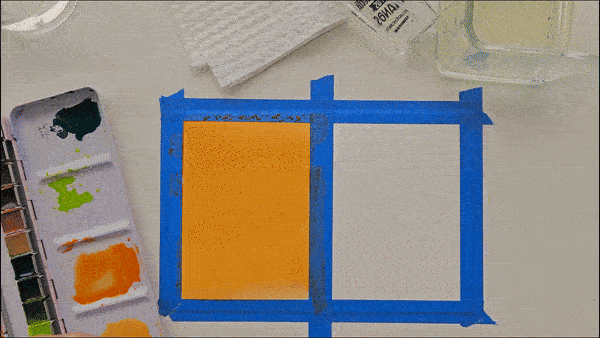
A flat wash in watercolor painting is one of the fundamental techniques used to apply a uniform, even layer of color across a section of the paper. This technique is essential for creating backgrounds, skies, or any area where a consistent tone is desired.
The flat wash consists of creating a flat, even layer of color across a section of the paper, this is one of the fundamental techniques used in watercolors and is essential for creating skies, backgrounds and any area where a consistent tone is desired.
Although achieving a flat wash might seem like an easy task, keeping the uniformity in the color and avoiding streaks or backruns (cauliflowers) might be a challenge for beginners.
Here’s some advice on how to get a perfectly flat wash:
- Combine enough paint and water in your palette for the area you intend to cover, ensuring an even mixture.
- Wet Paper (Optional): Optionally pre-wet the paper for a smoother wash, depending on the effect you want.
- Apply Paint: Use a wide, flat brush to apply the paint in horizontal strokes across the paper, starting from the top.
- Overlap Strokes: Each stroke should slightly overlap the previous one to avoid streaks; work quickly to keep edges from drying.
- Maintain a Bead: A bead of paint will form at the bottom of each stroke; gently guide this bead downward with each new stroke.
- Let Dry: Allow the wash to dry completely without tilting or moving the paper to prevent unevenness.
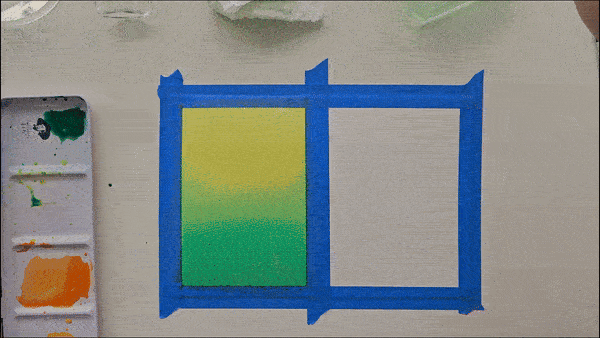
Graded Wash
A graded wash is a watercolor technique that consists of creating a smooth transition between two colors, or the same color going from a darker to a lighter value. Is great for landscapes, backgrounds, skies and is one of the easiest ways of making gradients in general.
In order to make a graded wash of the same color, we first need to:
Single-Color Graded Wash
- Prepare Your Paint: Mix a generous amount of your chosen color with water in your palette to start with a strong intensity.
- Begin at the Top: Using a wide, flat brush, apply the first horizontal stroke at the top of the paper.
- Dilute Your Paint: After each stroke, gradually add more water to your paint mix to decrease its intensity.
- Apply Overlapping Strokes: Continue with horizontal strokes down the paper, each slightly overlapping the previous one, and each progressively lighter than the last.
- Consistency is Key: Maintain a consistent rate of dilution and even pressure with each stroke to ensure a smooth gradient.
- Finish with Lightest Tone: The last strokes may be with almost clear water if a very light end is desired.
- Allow to Dry: Let the wash dry completely without tilting the paper.
Two-Color Graded Wash
- Prepare Both Paints: Mix two different colors separately in your palette, each with enough water to achieve the desired intensity.
- Start with the First Color: Apply the first color at the top with a horizontal stroke using a wide, flat brush.
- Begin the Transition: Before the first color dries, start introducing the second color by mixing a small amount of it with the first color.
- Gradually Introduce Second Color: Continue applying horizontal strokes downwards, gradually increasing the proportion of the second color in the mix with each stroke.
- Smooth Transition: Use overlapping strokes to blend the colors smoothly, moving from the first color to the second.
- End with Second Color: The last few strokes should be with the second color in its pure form, or very close to it.
- Drying: Allow the wash to dry completely to see the full effect of the gradient transition.
Wet On Wet Techniques
Blooming
Blooming is an effect that happens in watercolor when water (with or without pigment) is introduced in a damp area (or an area that is drying) causing a “backwash” or “cauliflower-like shapes”
This can happen unintentionally, due to the uneven wetness of the paper or us dropping water from our brushes, but can also be used on purpose to breathe interesting textures and patterns.
How It Happens:
- Unintentional Blooming: Often a result of adding more paint or water to an area of the painting that hasn’t fully dried. The new moisture pushes the existing pigment away, creating a blossom-like texture.
- Intentional Blooming: Artists may deliberately add drops of water or use a well-loaded brush onto a semi-wet wash to achieve specific textures or effects, controlling the outcome to enhance their work.
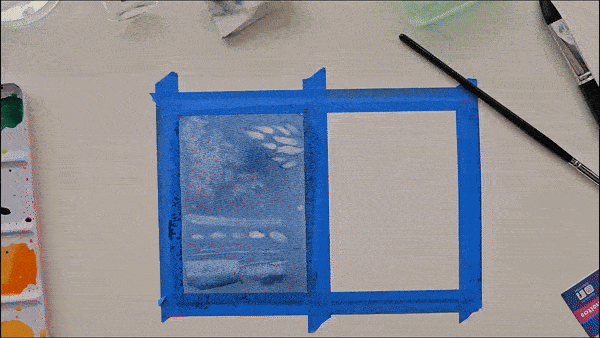
Lifting
Lifting is a technique that consists of removing or “lifting”paint from the paper, be it to correct mistakes, create textures, or to add light effects to your art. Since watercolor is a very flexible medium, lifting offers a wide range of possibilities that can be affected by the pigmentation and staining levels of the paint, the absorption levels of the paper, etc.
Lifting Methods
- Wet Lift: Applied to a wet or damp wash, this method involves removing paint immediately after application or while the wash is still wet.
- Dry Lift: This method is used after the paint has dried. It usually requires re-wetting the area gently with a clean brush and then lifting the paint.
Applications:
- Correction: Lifting can be used to correct mistakes by removing unwanted paint or to soften edges that are too hard.
- Highlights and Details: Artists often lift paint to create highlights on water, glass, metal, and foliage or to add texture and detail to various elements in a painting.
- Creating Texture: Lifting can also be used to create textures, such as the illusion of clouds in the sky, reflections on water, or the texture of fur and feathers on animals.
Bleeding
In watercolor painting, bleeding refers to the process of letting two colors “bleed” into each other by applying a heavily loaded brush into a damp area, creating beautiful transitions, seamless blending or interesting textures depending on the wetness of the paper and the amount of water on the brush. High quality watercolor paper will always provide better results, so take that into consideration before trying this technique.
Other Watercolor Techniques
Dry Brushing
Dry brushing consists of using a brush that’s almost dry but has a tiny bit of paint on it. Before you paint, you brush off most of the paint on something like paper or cloth until there’s barely any left. Then, you lightly brush over the surface of the paper you’re painting on. This way, only the parts of the paper’s texture that stick out get painted, and it creates a cool effect. This technique is perfect for adding texture to your work, and it is used a lot in landscape painting to paint tree barks, grass, waves or rocks, to create clouds, atmospheric effects or to add highlights as well.
Pulling and Feathering
Pulling is a more advanced watercolor technique that consists of laying down a wash of color and then, while the wash is still wet, using a clean, damp brush to pull the color across the paper. This technique is perfect for making gradients, soft transitions, and can be used to:
- Soften edges: By pulling color away from a specific area, you can soften the edges of objects, making them appear more integrated with their surroundings.
- Blend colors: It’s a sophisticated way to mix colors directly on the paper, creating a natural blend without harsh lines.
Feathering in watercolors is like when you softly spread paint on an already wet surface to make smooth, fuzzy edges, kind of like how a feather looks. To achieve this effect all you have to do is dip a brush in paint and then lightly touch it the wet area of the paper. The paint will spread out in a soft, gentle way, blending into the paper or into other colors nearby. This is great for making things look soft and natural, like clouds, shadows, or fur. It’s a way to mix colors gently or create a fluffy texture on your painting without any harsh lines.
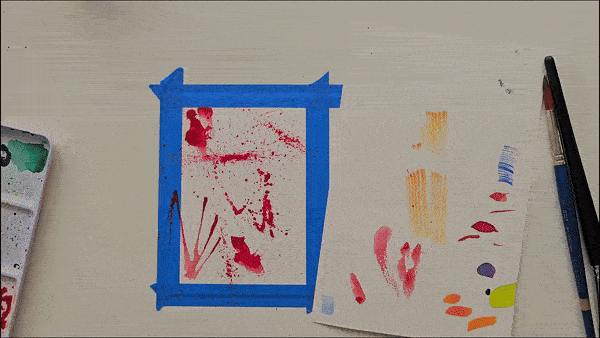
Splattering
Splattering is one of the most fun, dynamic and hard to control techniques in watercolor painting, it involves flicking your brush, splashing your paper with paint, blowing air strongly to a bead of paint and anything that can create a dynamic, spontaneous splatter effect. This technique is used to simulate rain, stars, add texture to a finished piece, etc. You can use a stiff brush, a toothbrush, or even your fingers to flick the paint onto your paper. Each tool will create a different size and distribution of splatters.
Wet on Dry
Wet on dry covers a wide range of techniques, but at the basics, it consists of applying wet paint onto dry paper or a dry layer of paint. This approach allows for more control and precision in the application of paint, producing sharp, clear edges and solid washes of color.
While learning and utilizing the many wet on dry techniques are very important, first you gotta get to know your brushes and the different traces and marks you can make with them. Play with the paint flow, pressure, change the angles and experiment beforehand and you’ll have a much easier time with the technique.
The technique is versatile, making it suitable for detailed work, adding fine textures, or layering colors without them bleeding into one another. It’s ideal for when you want to build up colors gradually or add small, defined elements to your painting, such as leaves on a tree, ripples in water, or architectural details.

Leave a Reply