

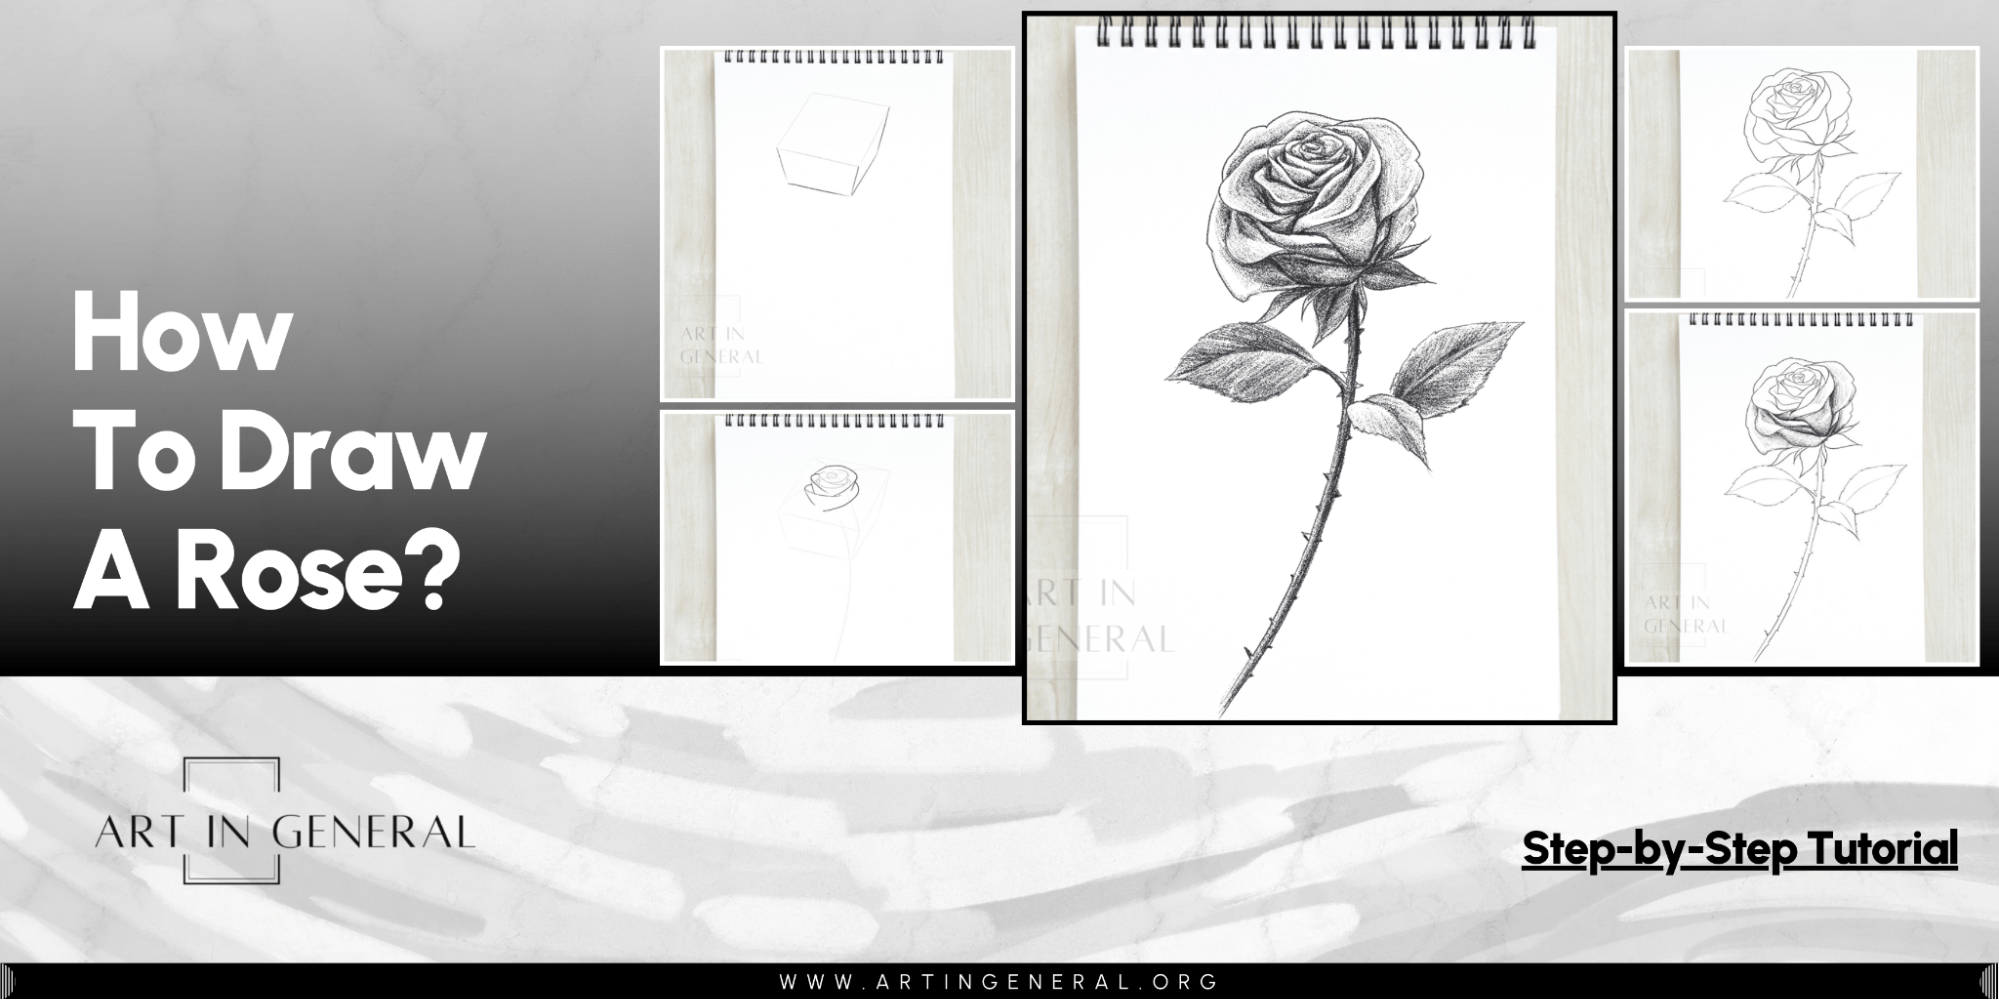
Roses are always a beautiful subject to draw, they’re stunning but can be a bit tricky with all their petals, layers, and colors. Drawing a rose isn’t just about making it look right; it’s about seeing how light and shadows work together to make the rose look real and alive.
In this article, we’ll guide you step-by-step through the process of drawing a rose, from the initial sketch to the final touches so whether you’re a beginner or a pro looking for some inspiration you’ll have an easy process to follow and all the tips and tricks needed to create a stunning rose drawing.
Let’s get started!
Materials Needed
For this tutorial you’ll need:
- An HB Pencil
- A 2B Pencil
- A 4B Pencil
- A Piece of Paper or a Sketchbook
- A Kneaded Eraser
- A Normal Eraser
Rose Drawing Process
How To Draw a Rose Step-by-Step
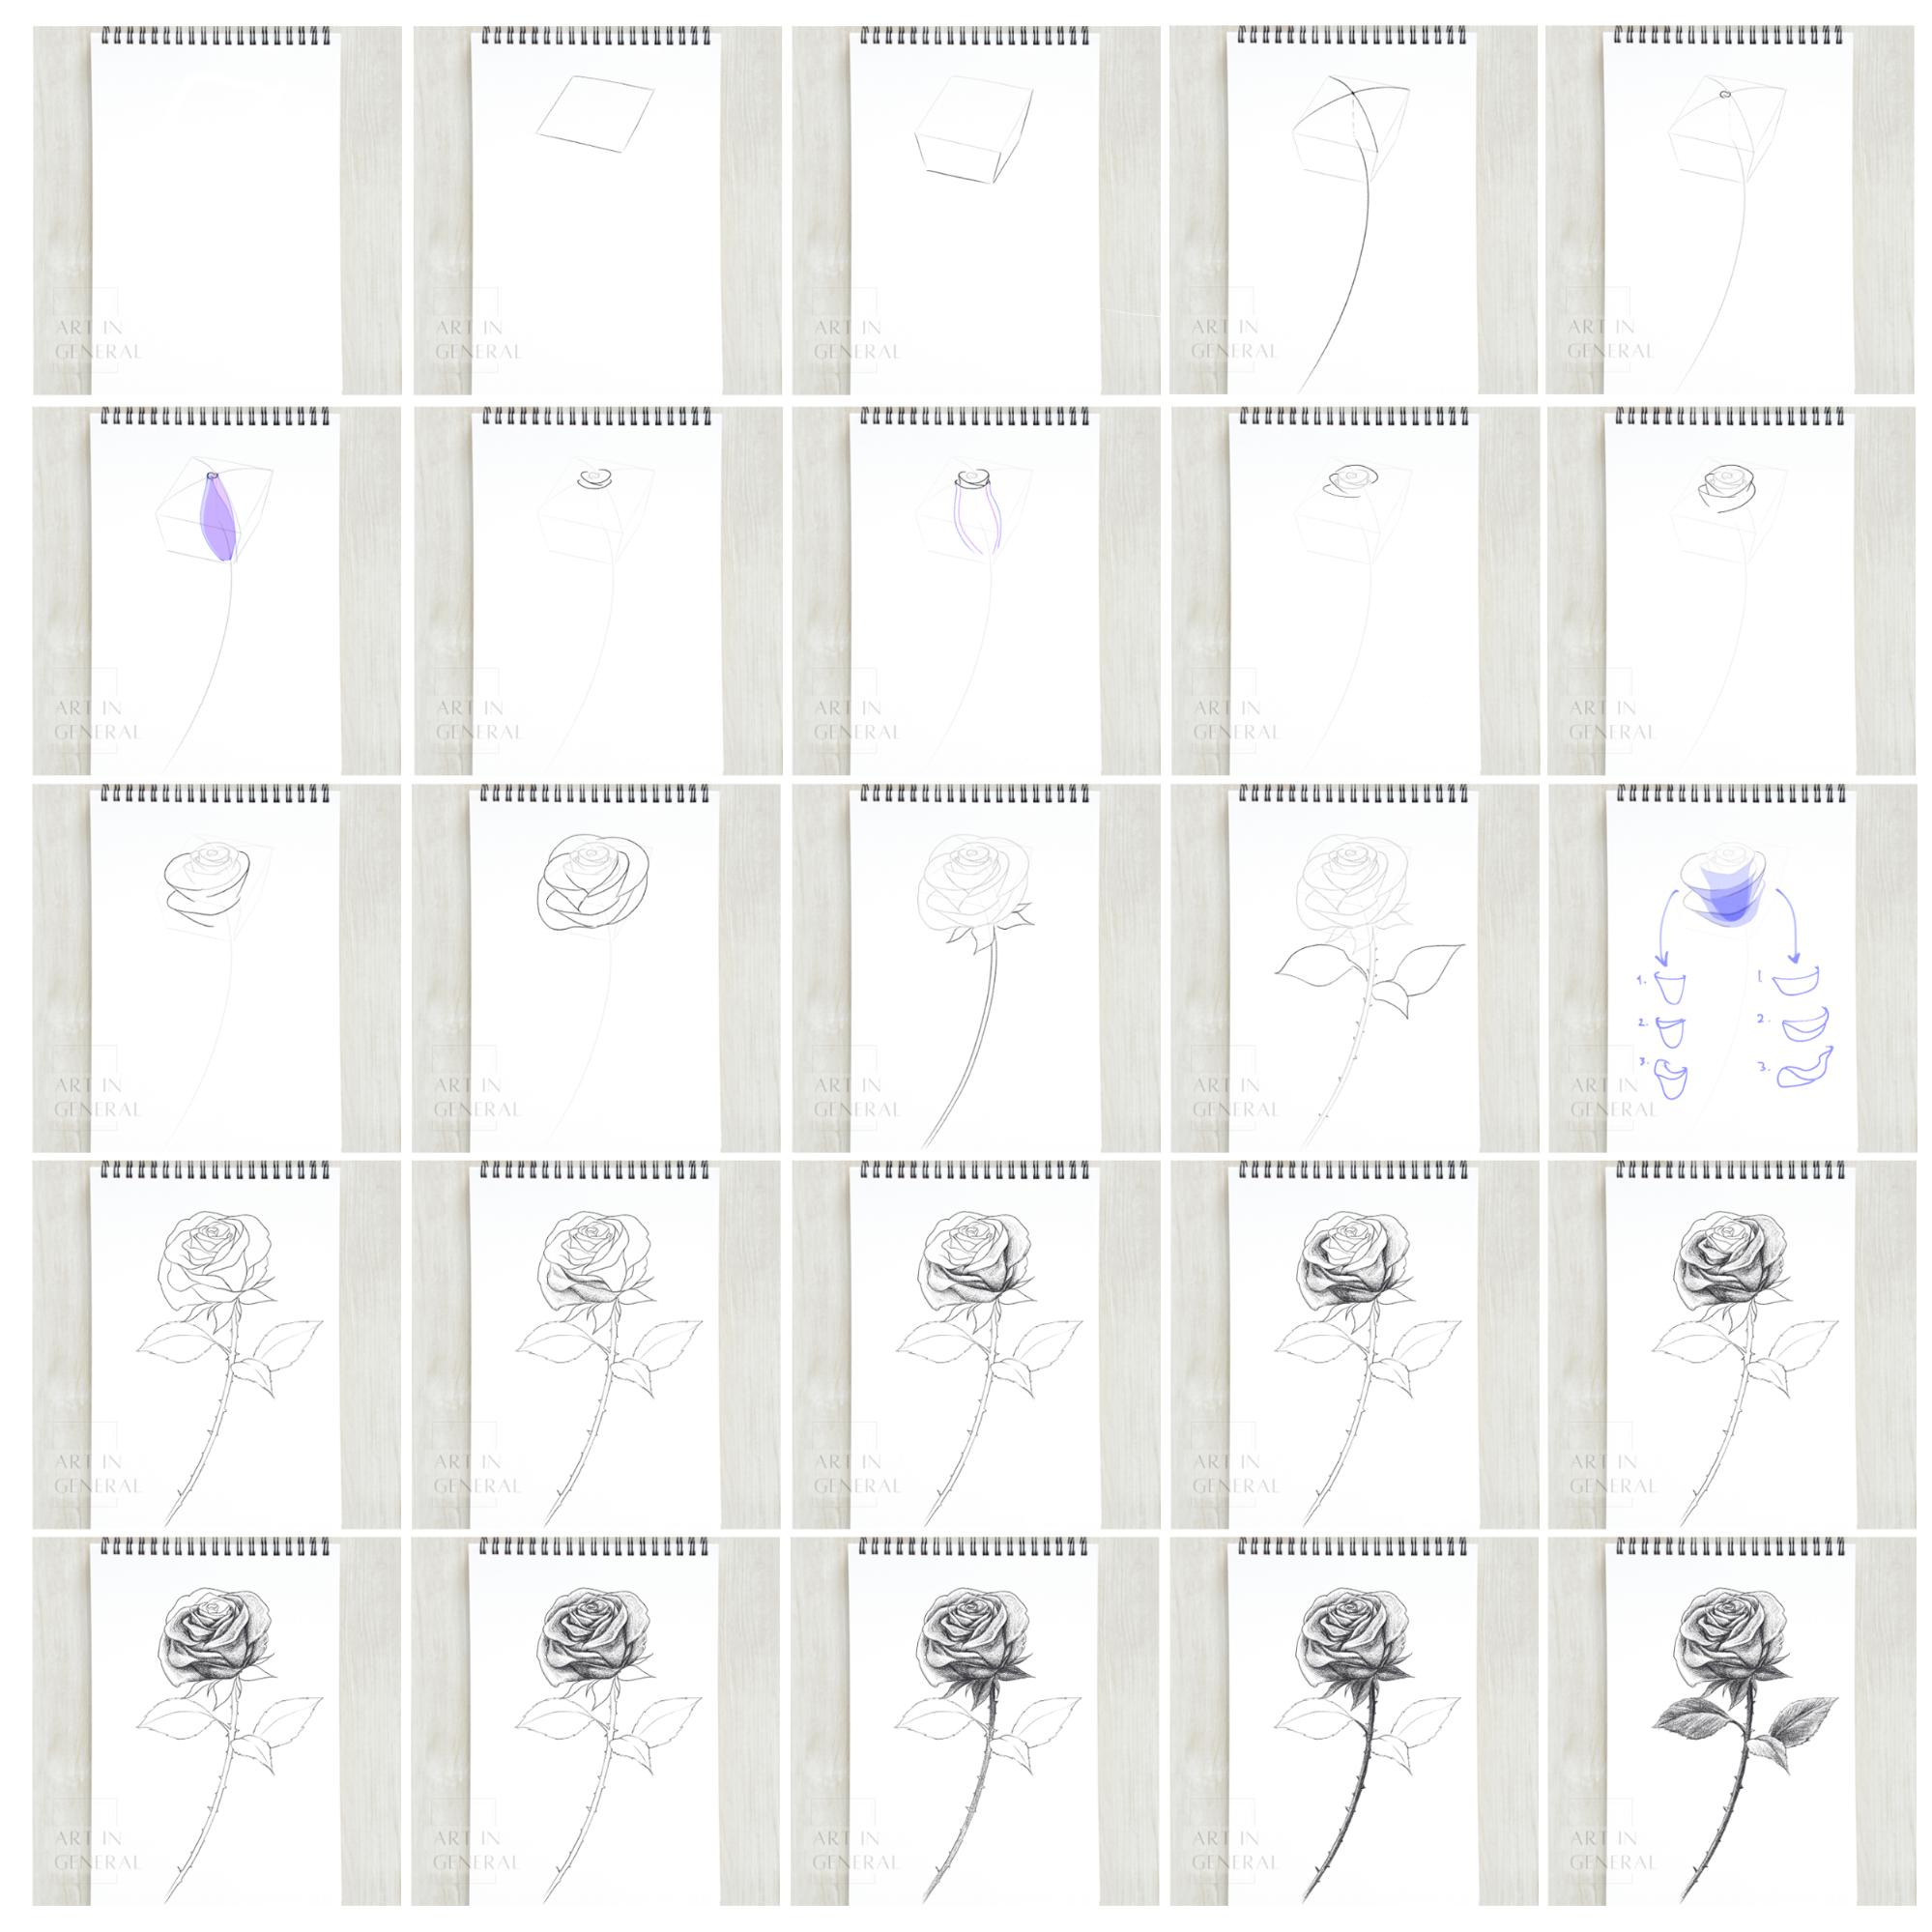
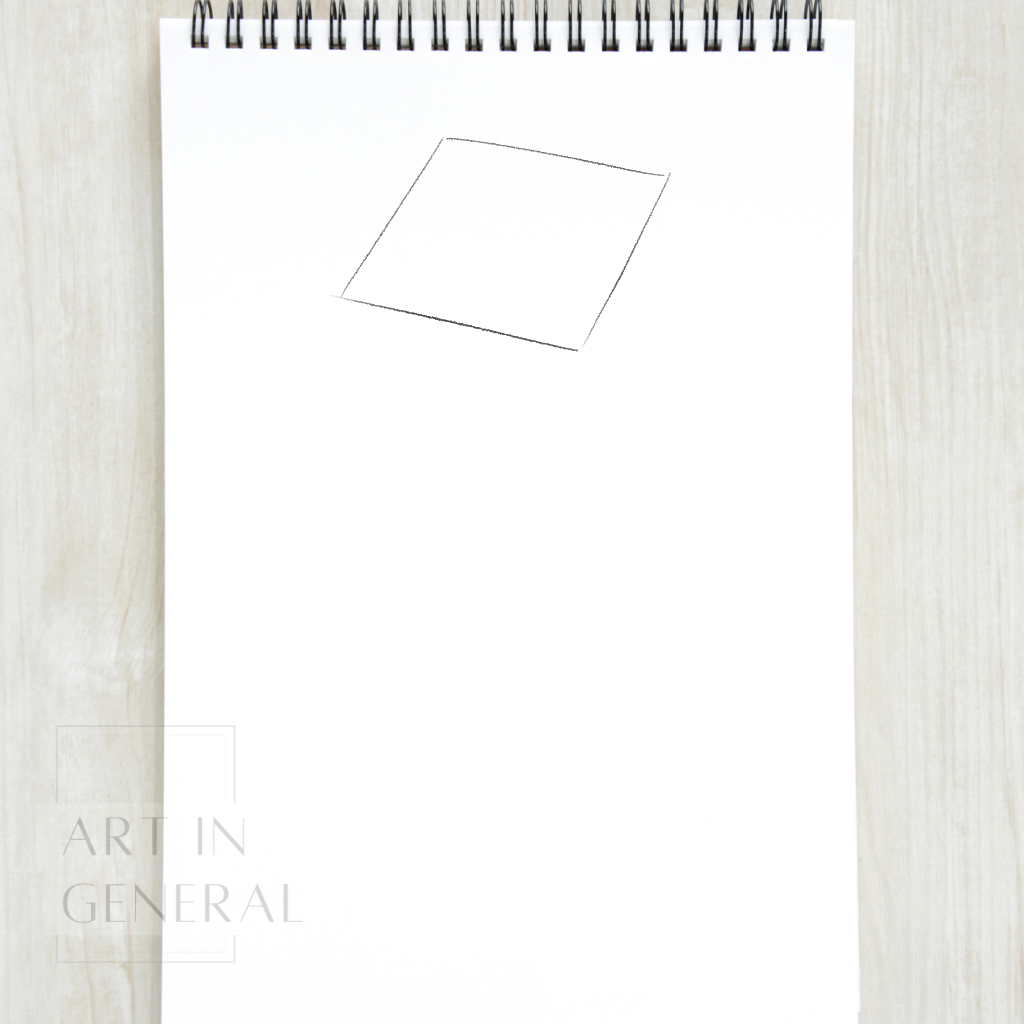
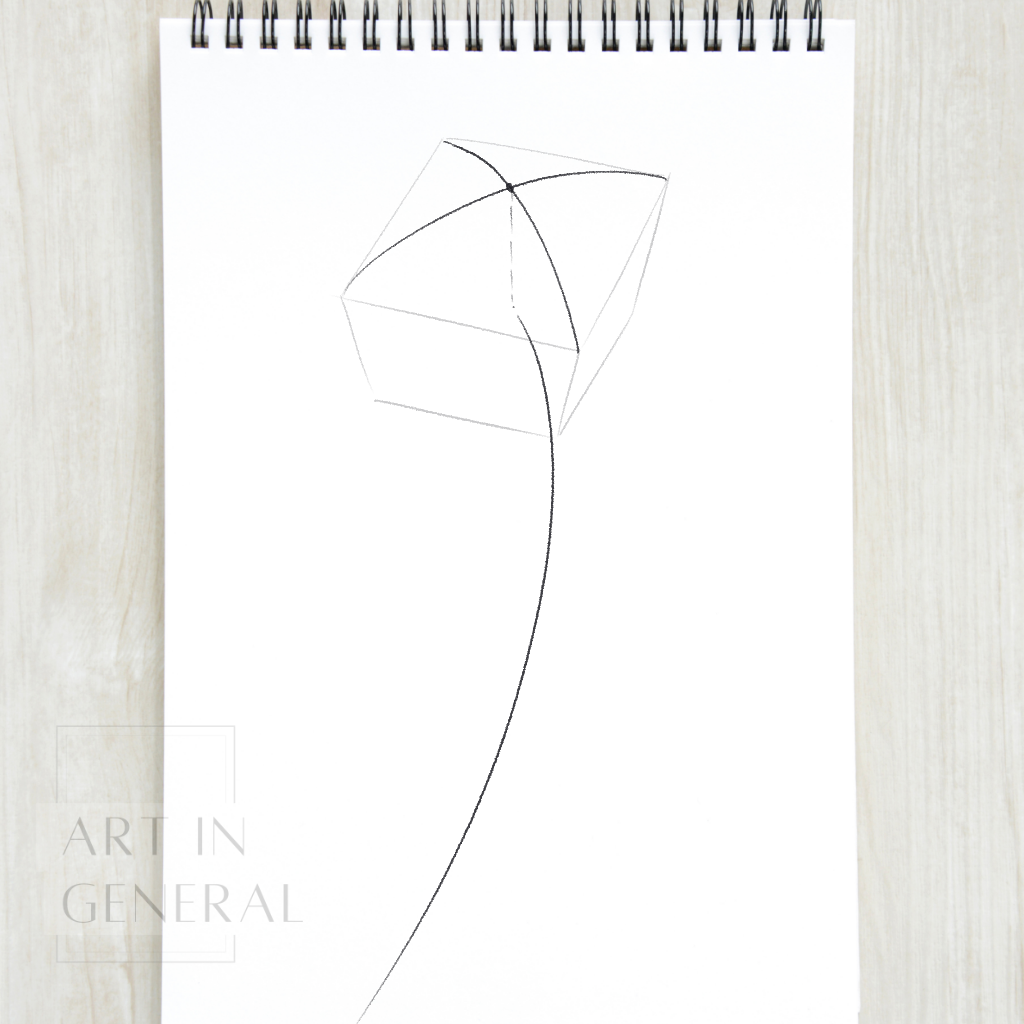
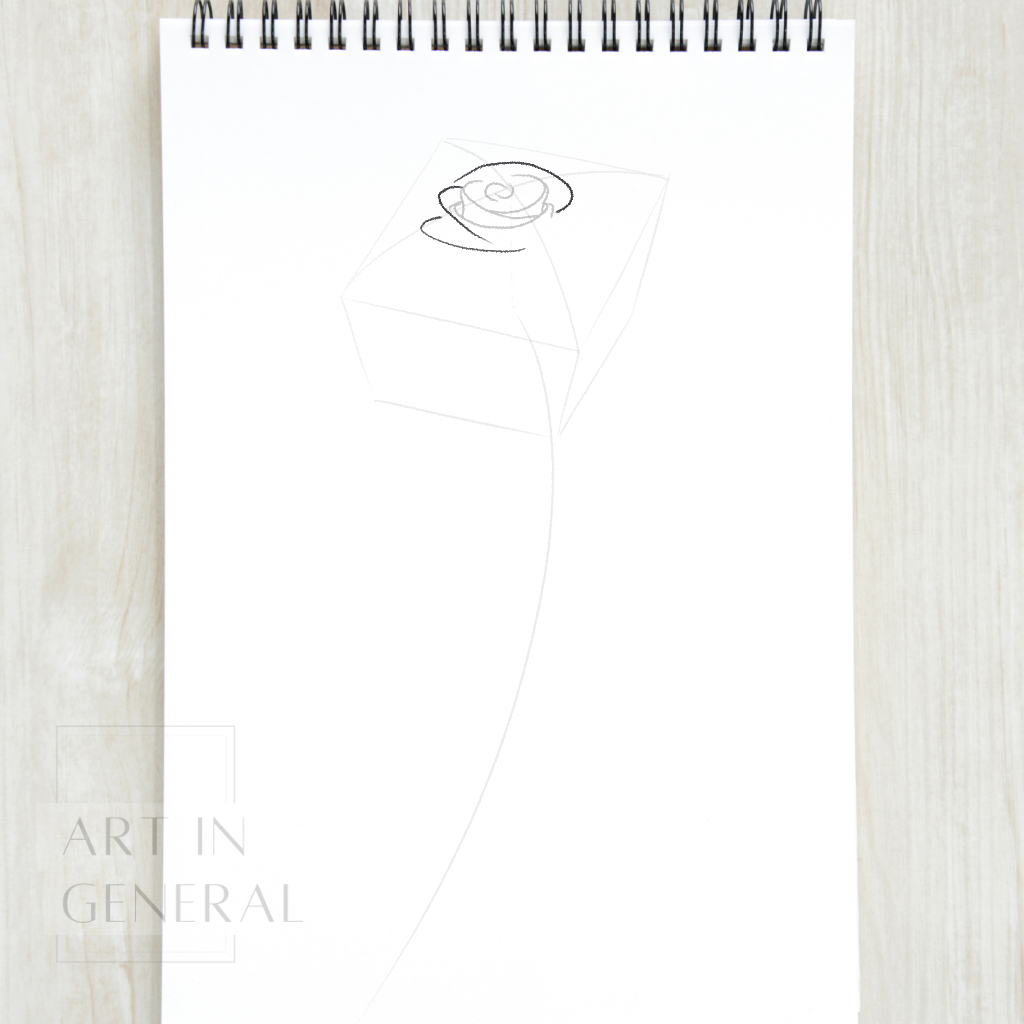
Step 1 — Draw a Square
Draw a slanted square where you want the rose crown to go. We’re going to use a little perspective here so we can correctly locate the center of the rose and the stem.
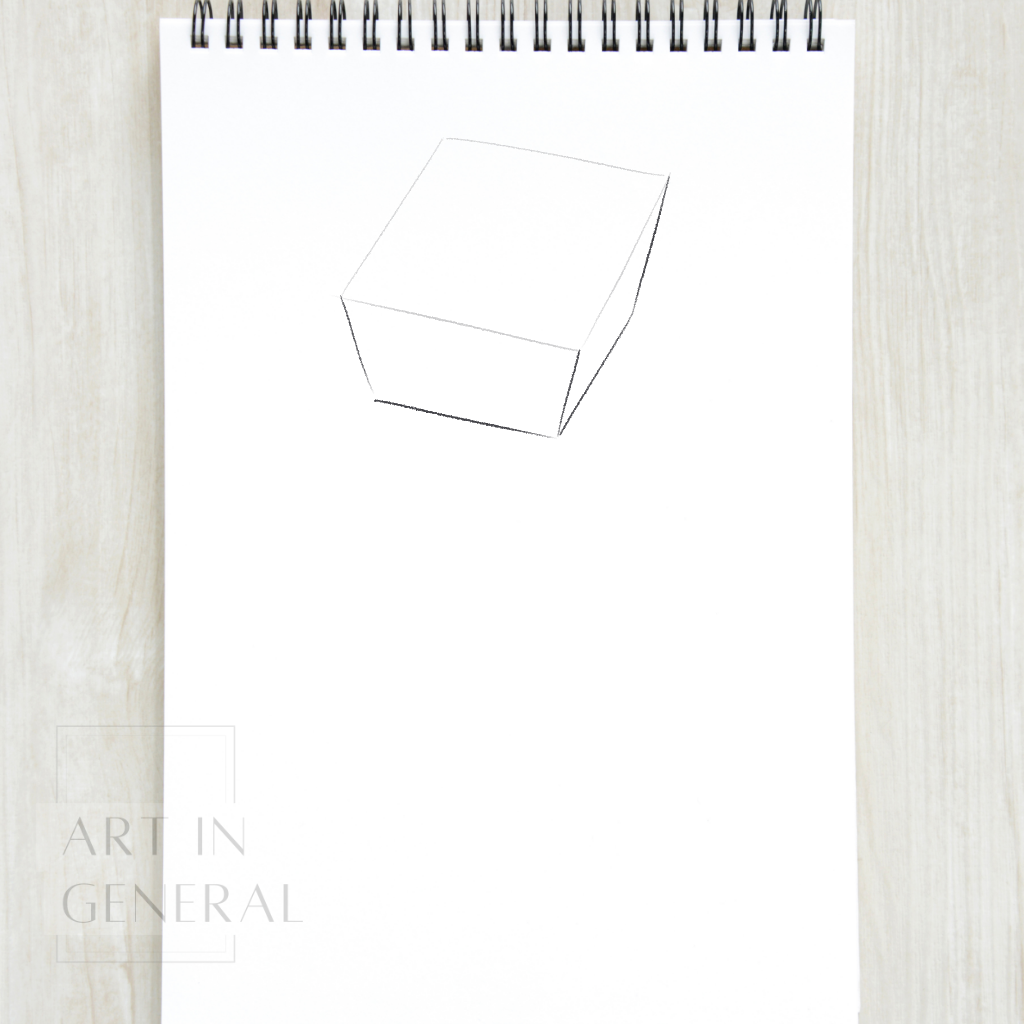
Step 2 — Make it a Cube
Make our square into a cube-ish shape this will be our guideline for the rose’s crown.
Step 3 — Draw the Stem
Since roses are not flat but have volume in the middle, we’re going to draw two curved lines in an “X-like” shape to find the center of our rose. Once you find it, trace a soft line towards teh base of our cube and draw the stem from there. It doesn’t have to be perfectly straight, it being curved will give it a nice effect.
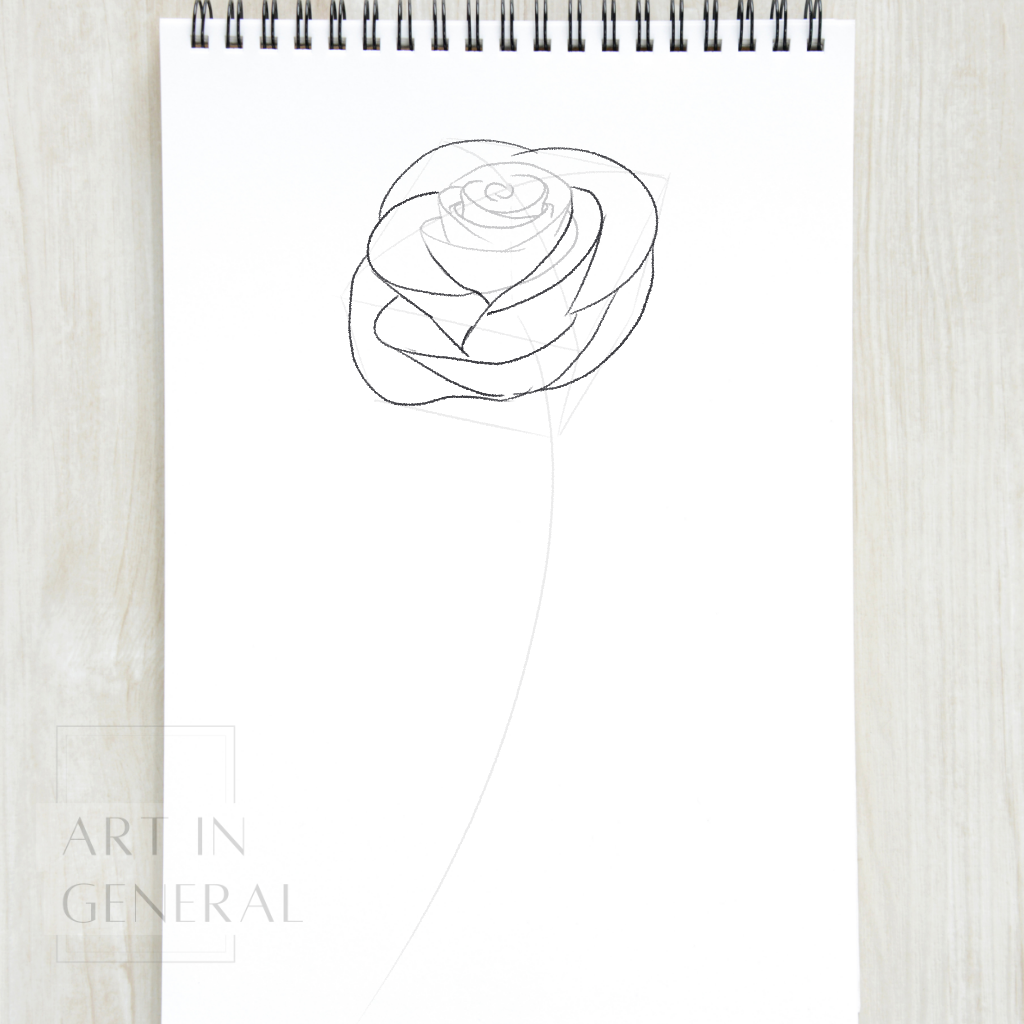
Step 4 — Draw two “C-shapes”
Here comes the complex part, but we’re going to make it simple. Erase the guidelines softly with your kneaded eraser and draw a small “C-shape” parting from the middle point we found in step 3. Then draw another one around it.
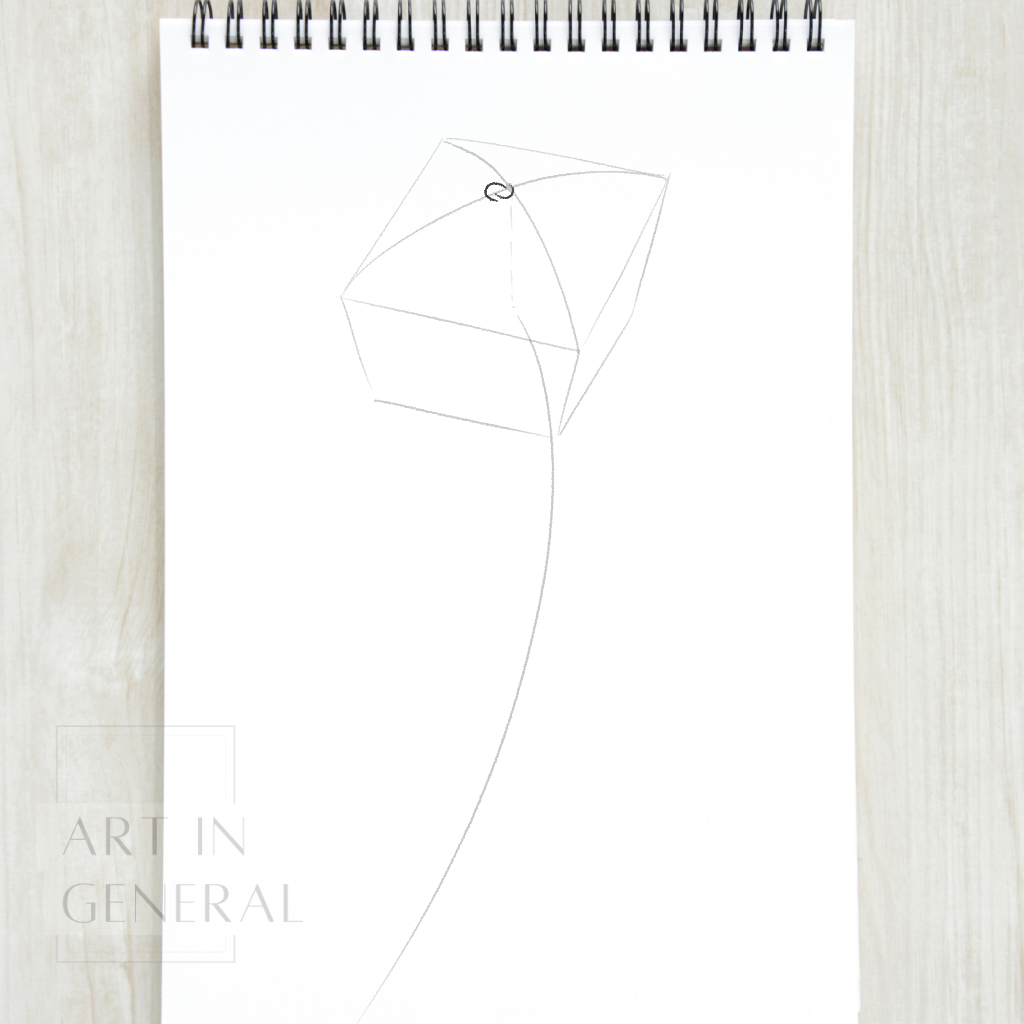
Step 4 — Imagine
Now let’s use our imagination to see the inner part of our rose, the middle petals are the ones around the “bulb”, wrapping into each other tightly. Use this image to build the rest of the petals from there.

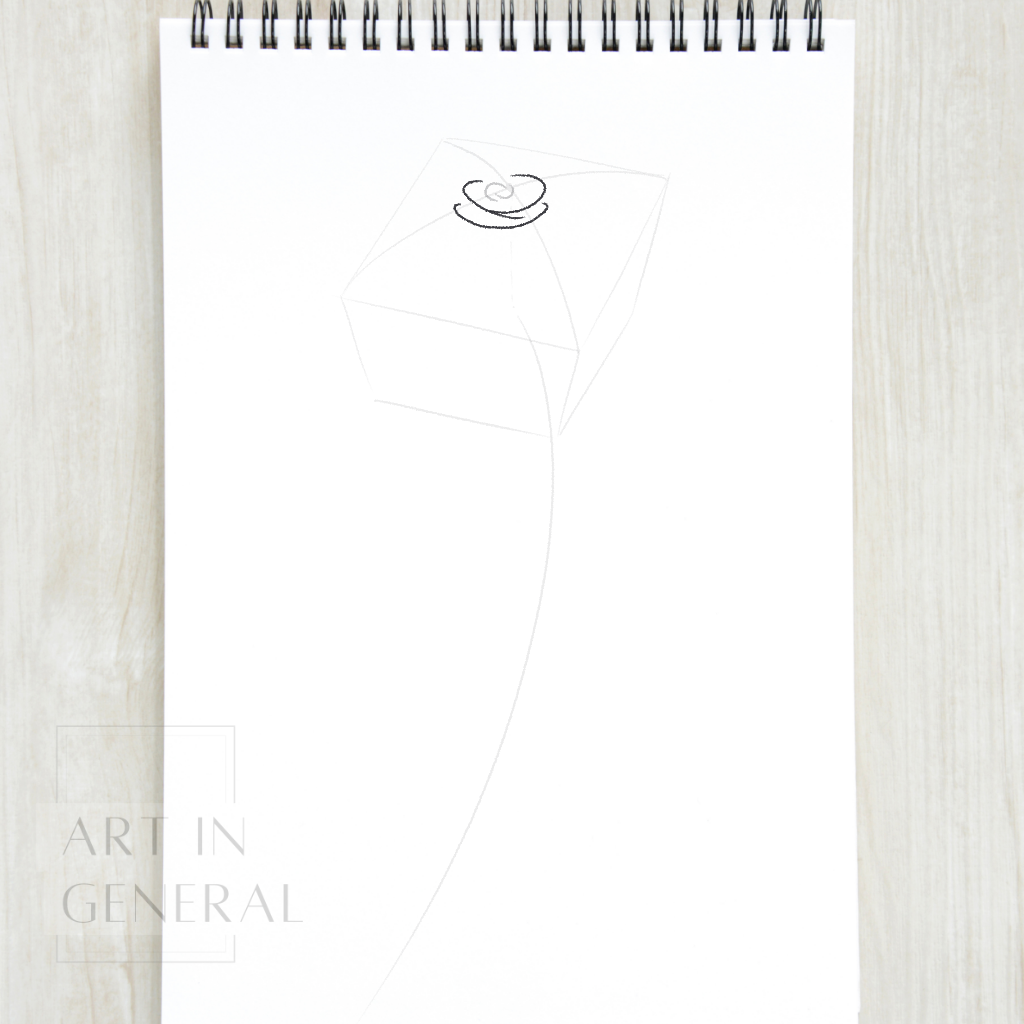
Step 5 — Draw more petals
Draw more C-like shapes, this time make them elongated, and one on top of the other. Remember they’ll wrap around the “bulb” but will slightly open as they grow.
Step 7 — Draw more petals
Continue Drawing more petals using curved lines, remember to overlap them onto each other and to make them bigger as you reach the cube limits.

Step 8 — Draw the last petals
Once you’ve reached the cube’s limits, draw the last thre eor four petals. These will be completely open and evne alittle bit bent so use larger shapes and more organic lines.
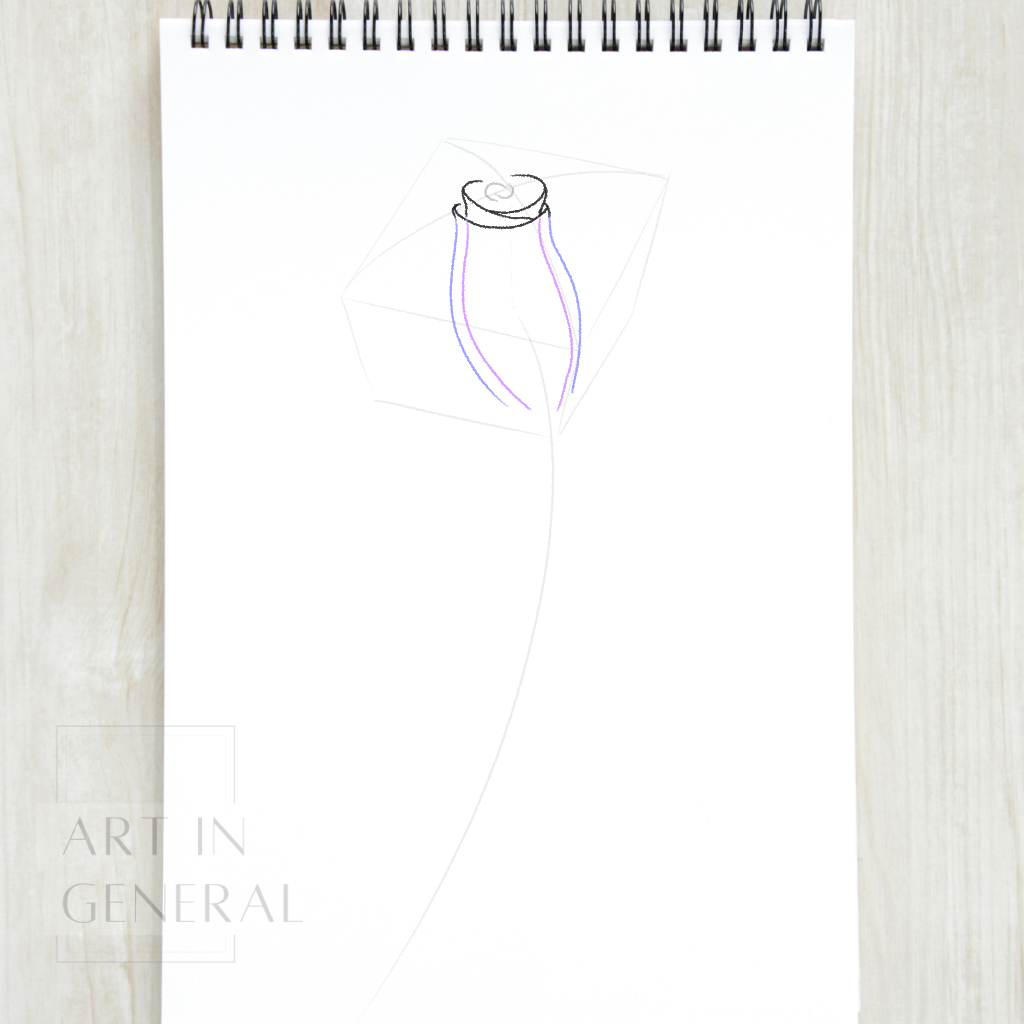
Step 9 — Draw the stem and sepals
Draw the stem by adding another line next to the one we did on step 3 and add some sepals.
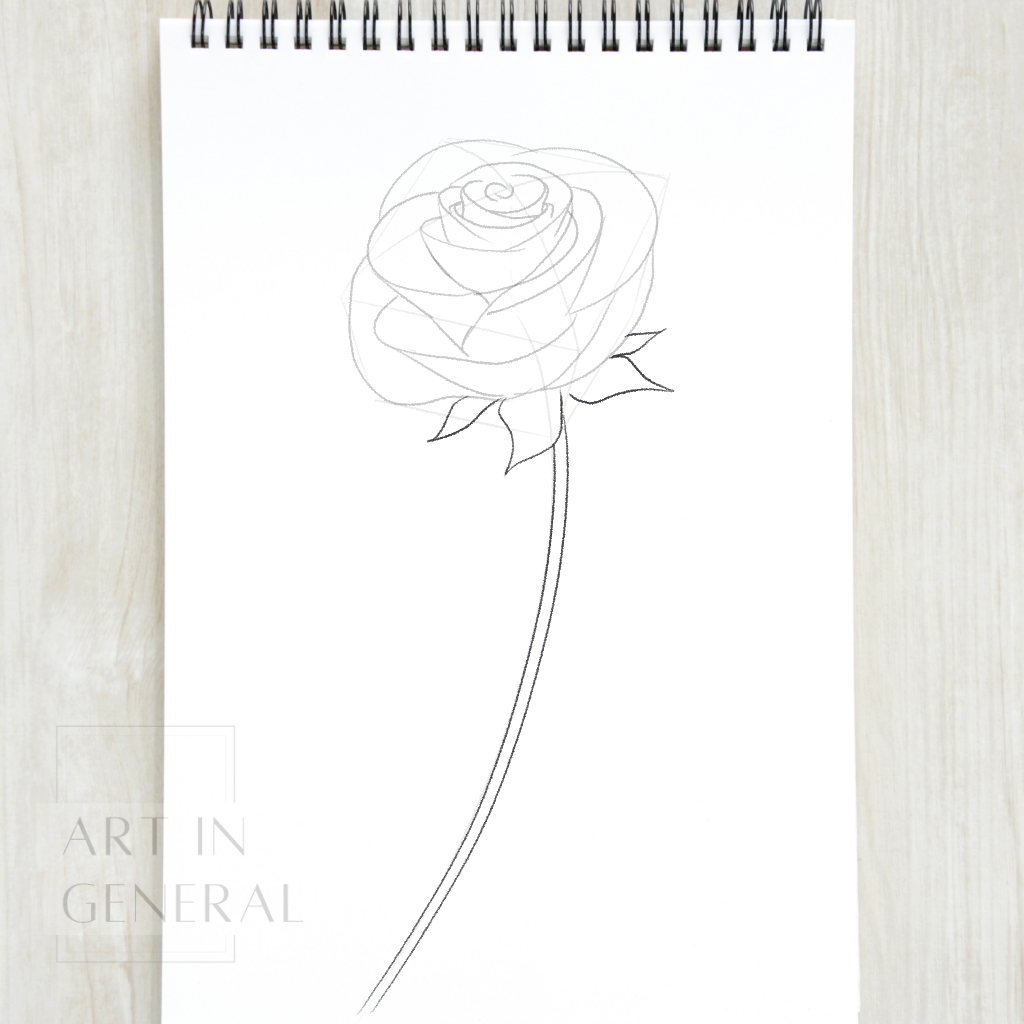
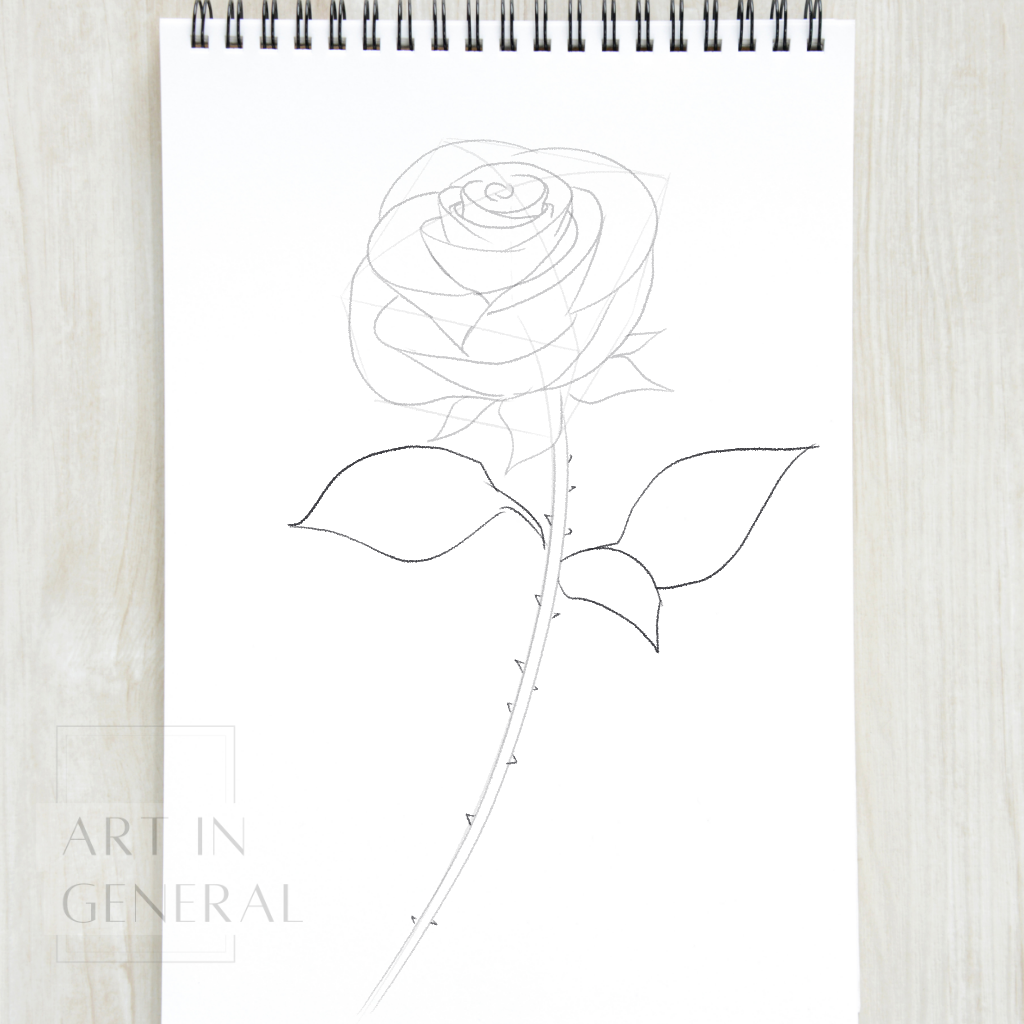
Step 10 — Draw the leaves and thorns
What is a rose without thorns? Draw some thorns on the stem and add some leaves on the side.
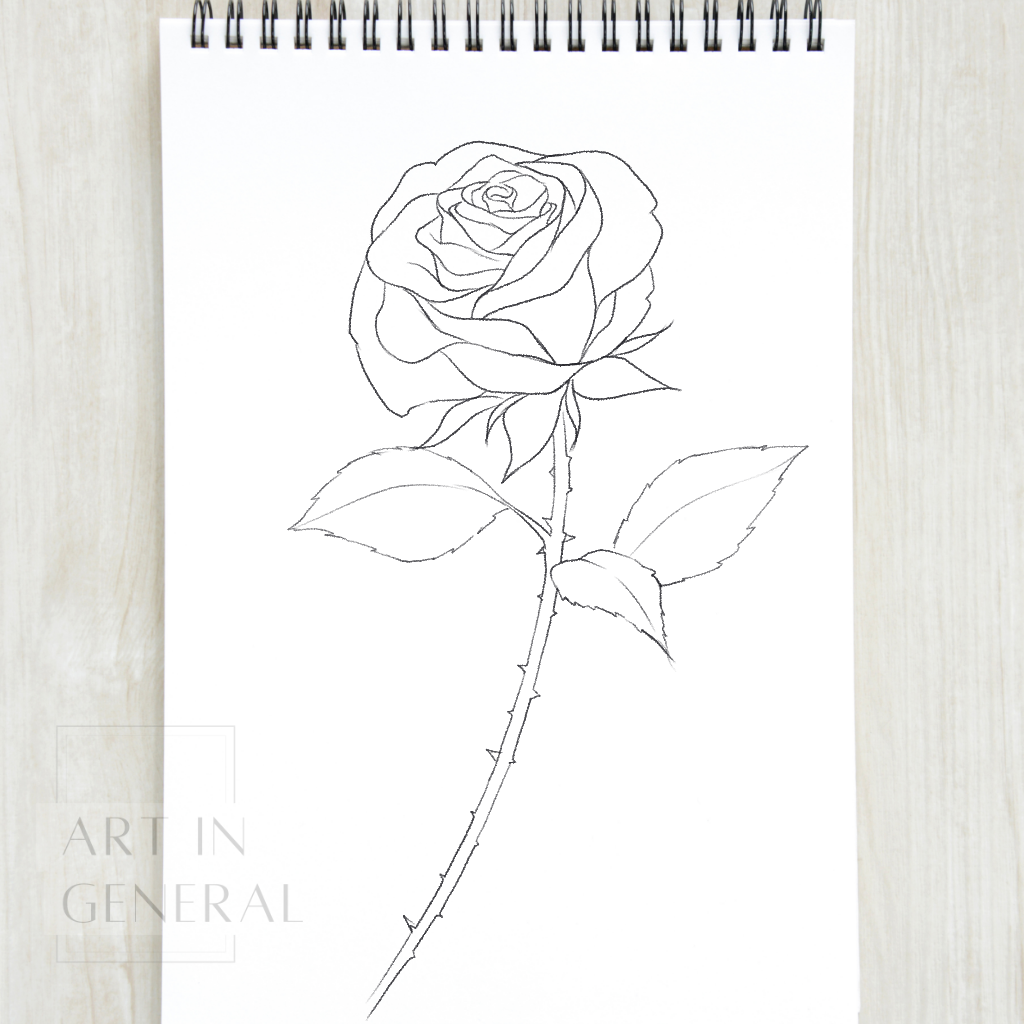
Step 11 — Erase everything
What? But didn’t we just finish?
Nope, we finished the sketch. Let’s start our rose for real, but first, let’s see hot to turn our sketch petals into real petals.
Follow the steps in the diagram and apply them to every layer of your rose, practice first on a spare piece of paper and then eraser everything so you have faint markings left and start outlininig your rose.
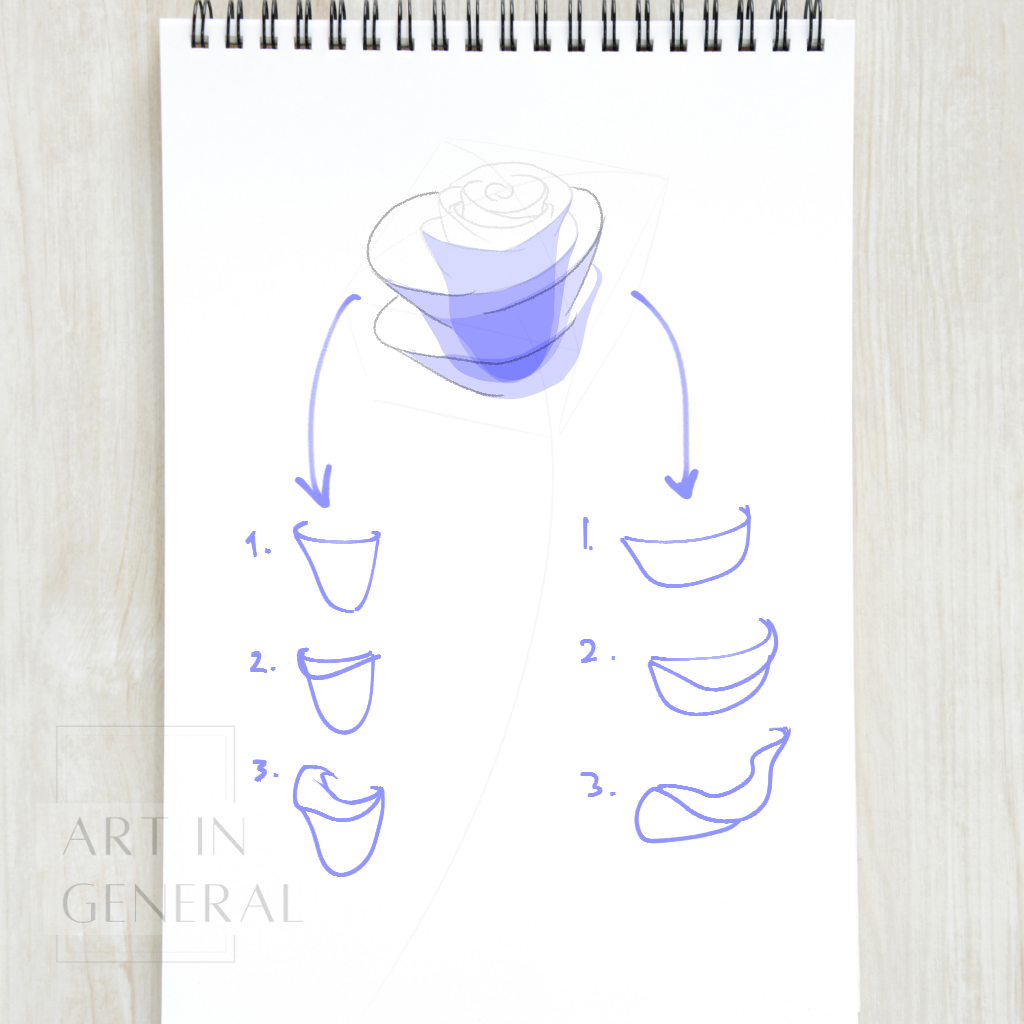
Remember to outline the stem and to add the typical serrated effect to the leaves too.
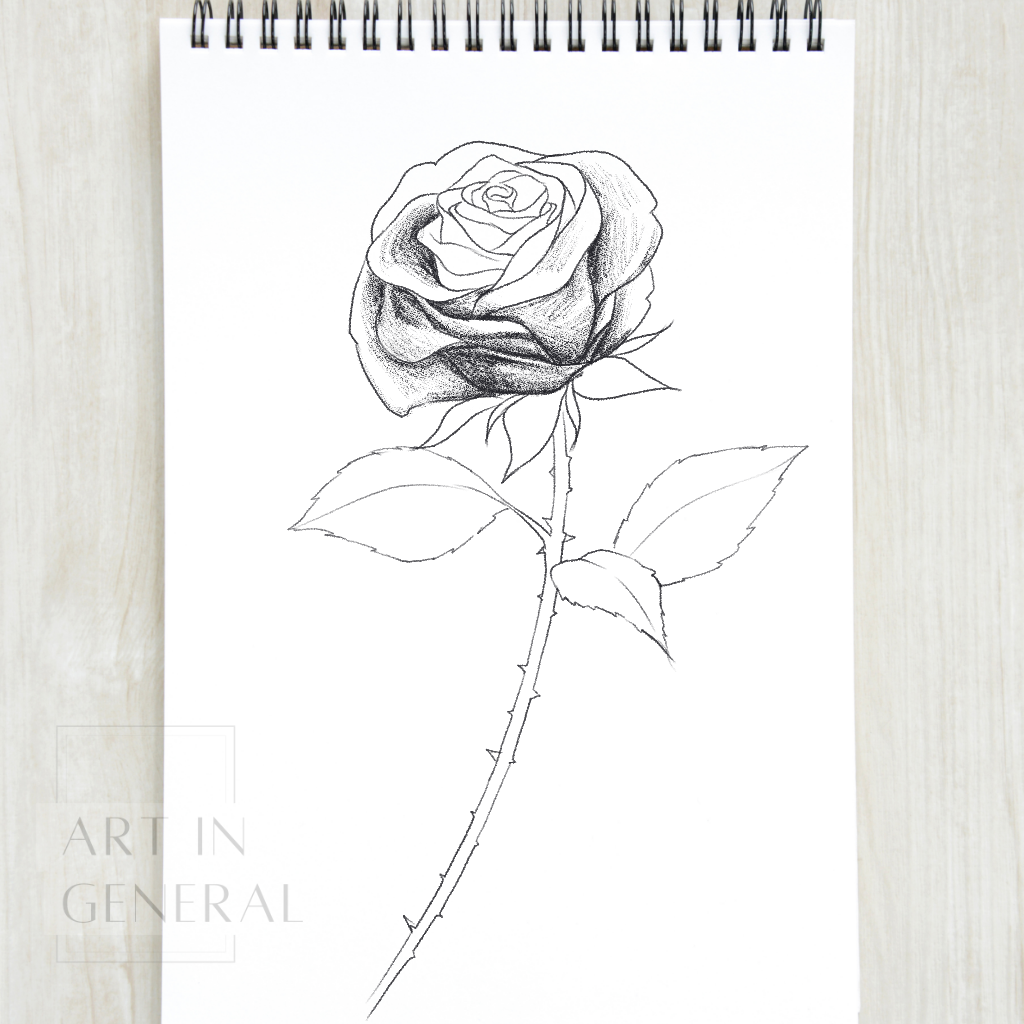
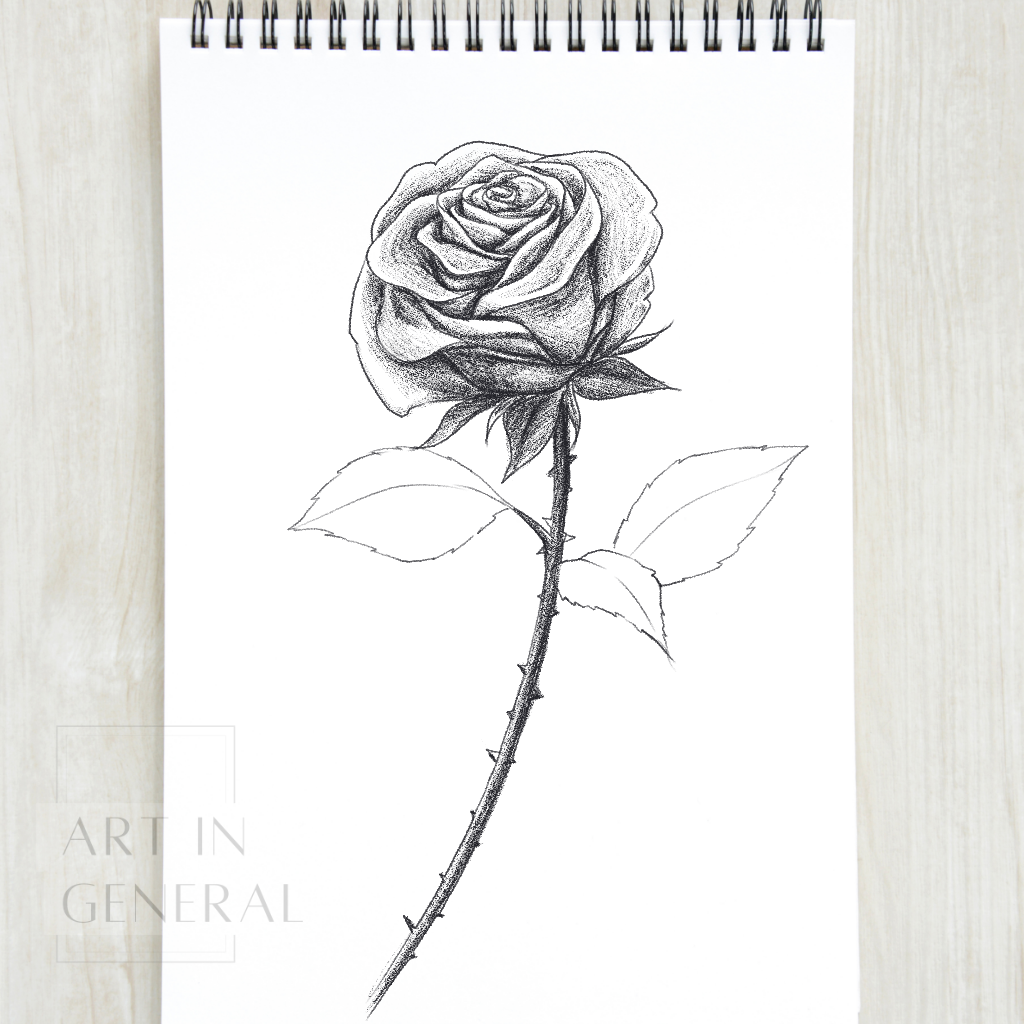
And there you go, a beautiful roise ready to be shaded.
Step 11 — Start shading your rose
Start with the outer petals adding shadows to the base and the folding parts of them.
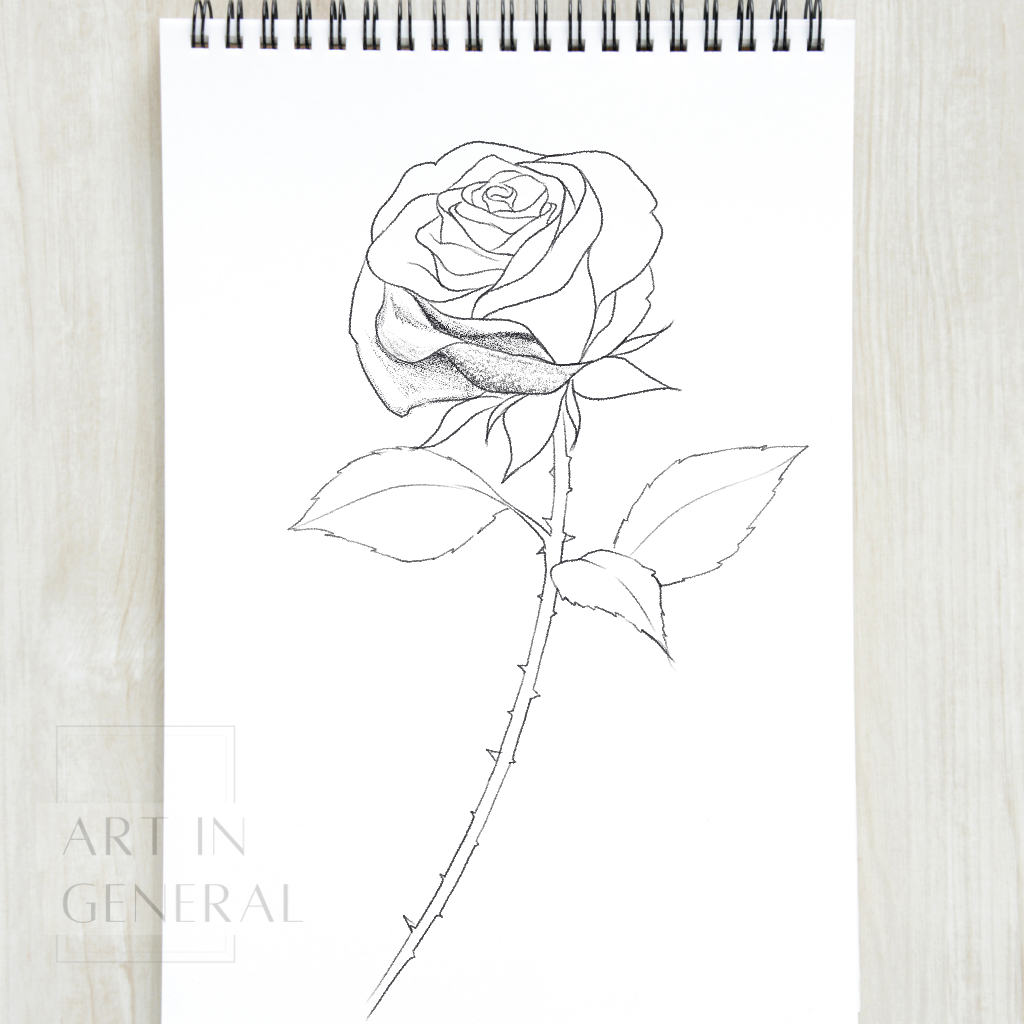
Work your way up adding more shadows as you progress.
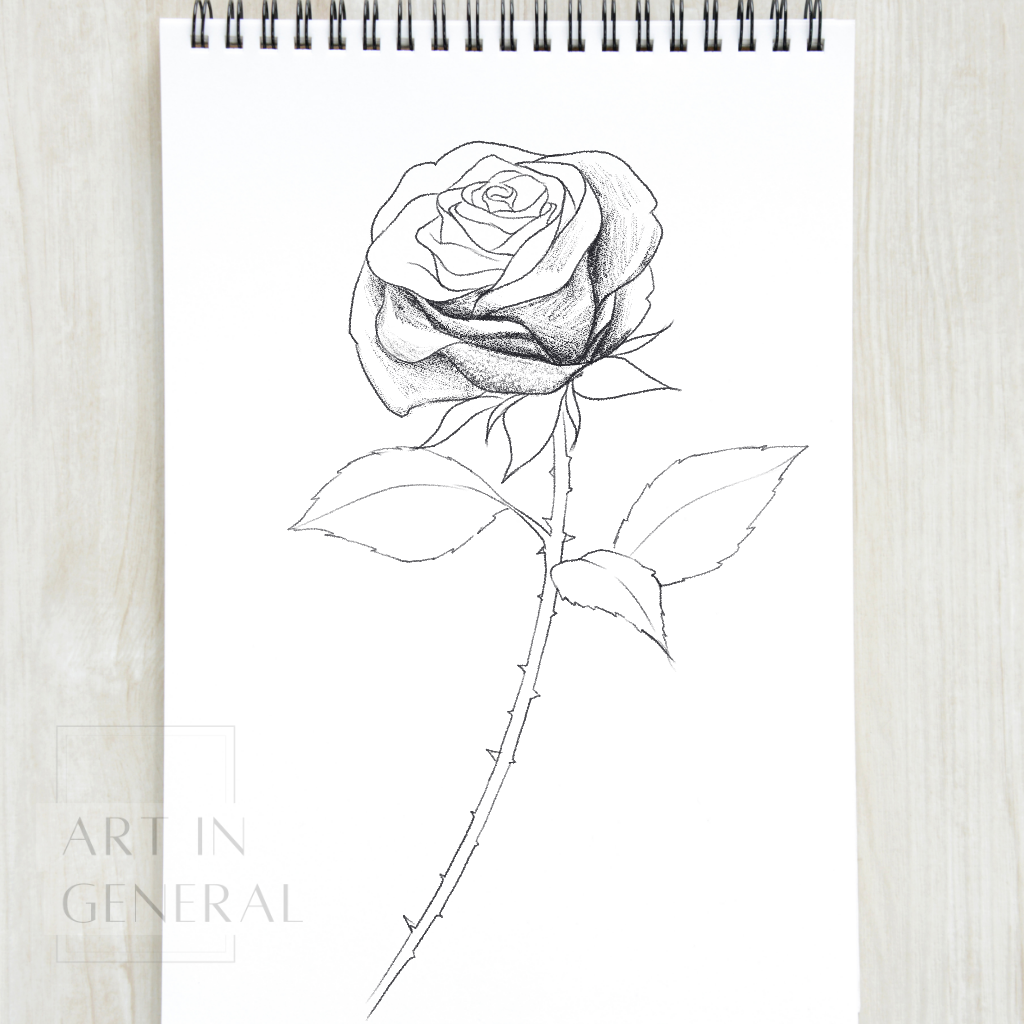
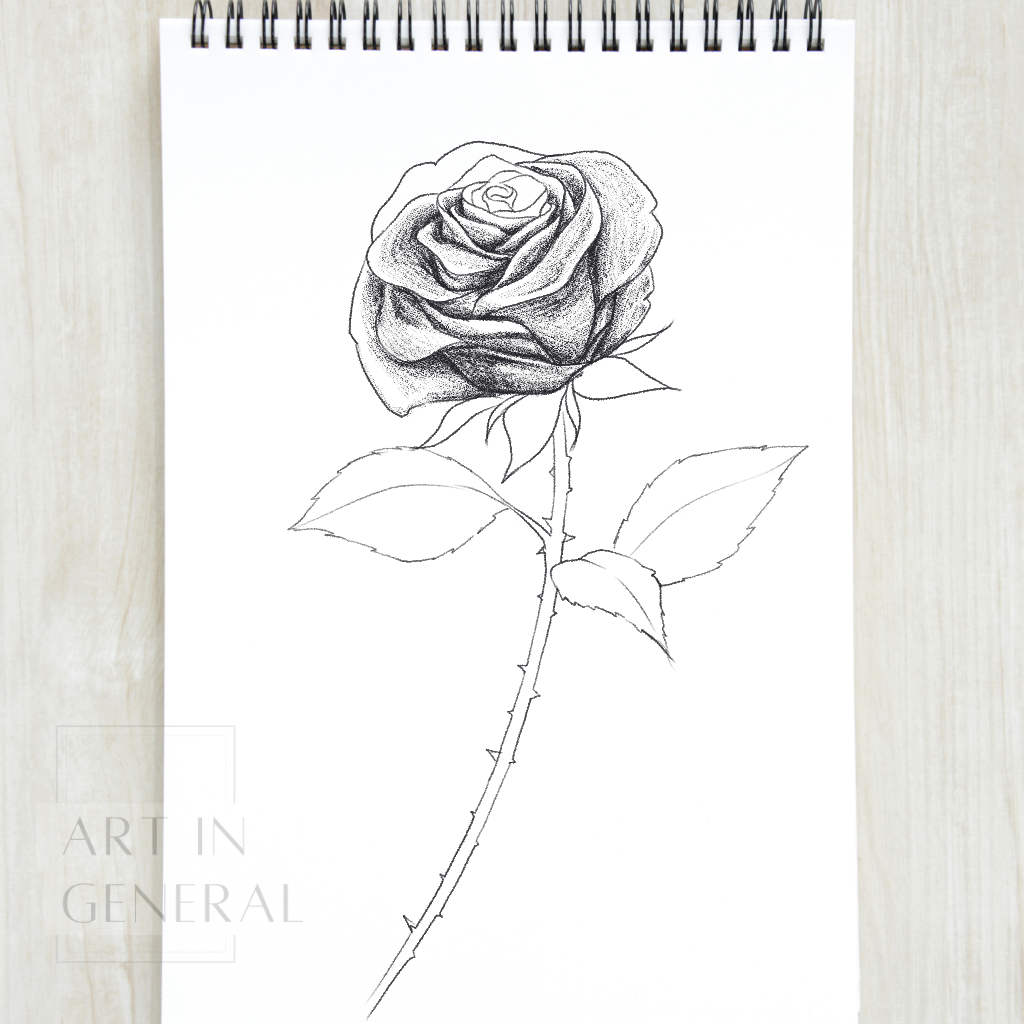
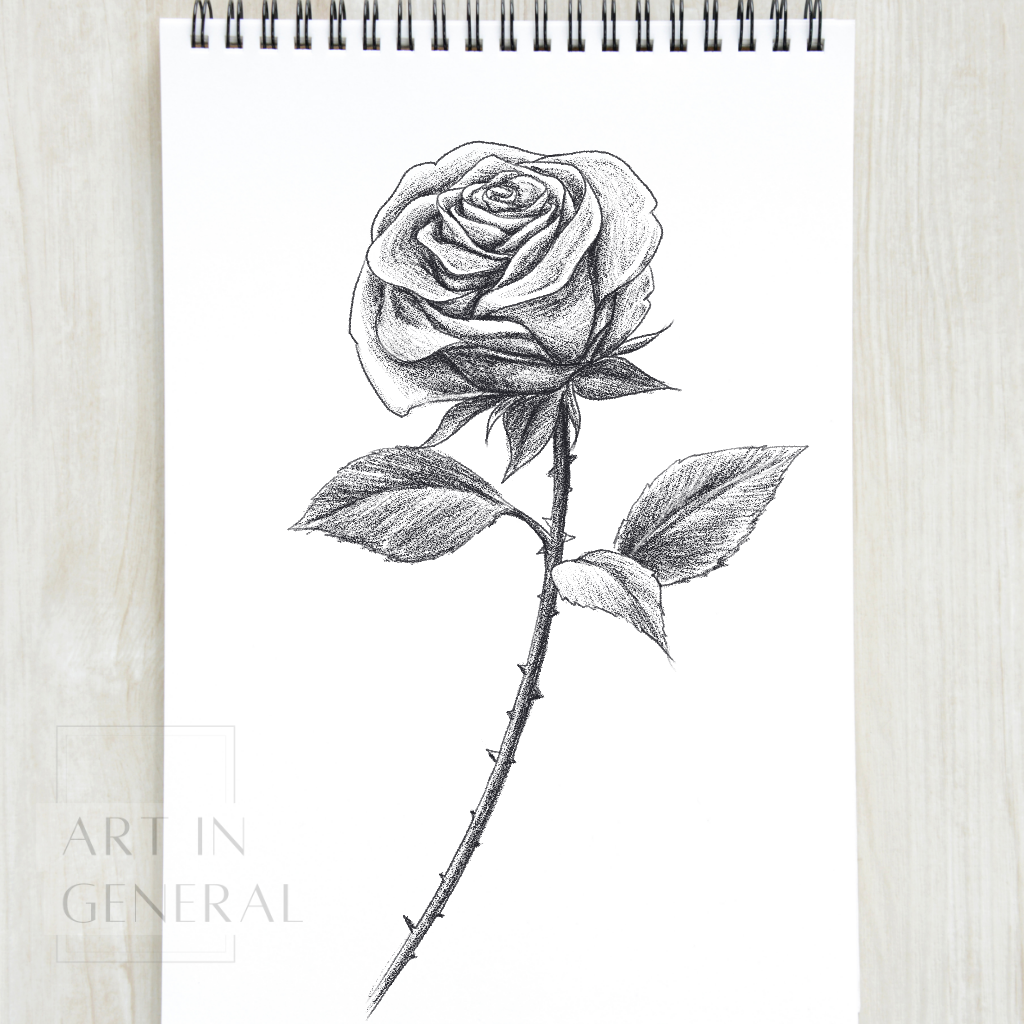
Step 12 — Keep shading your rose
Use your 2B and 4B pencil for the deepest shadows and your HB pencil with light pressure for the top of the petals and where the light hits.
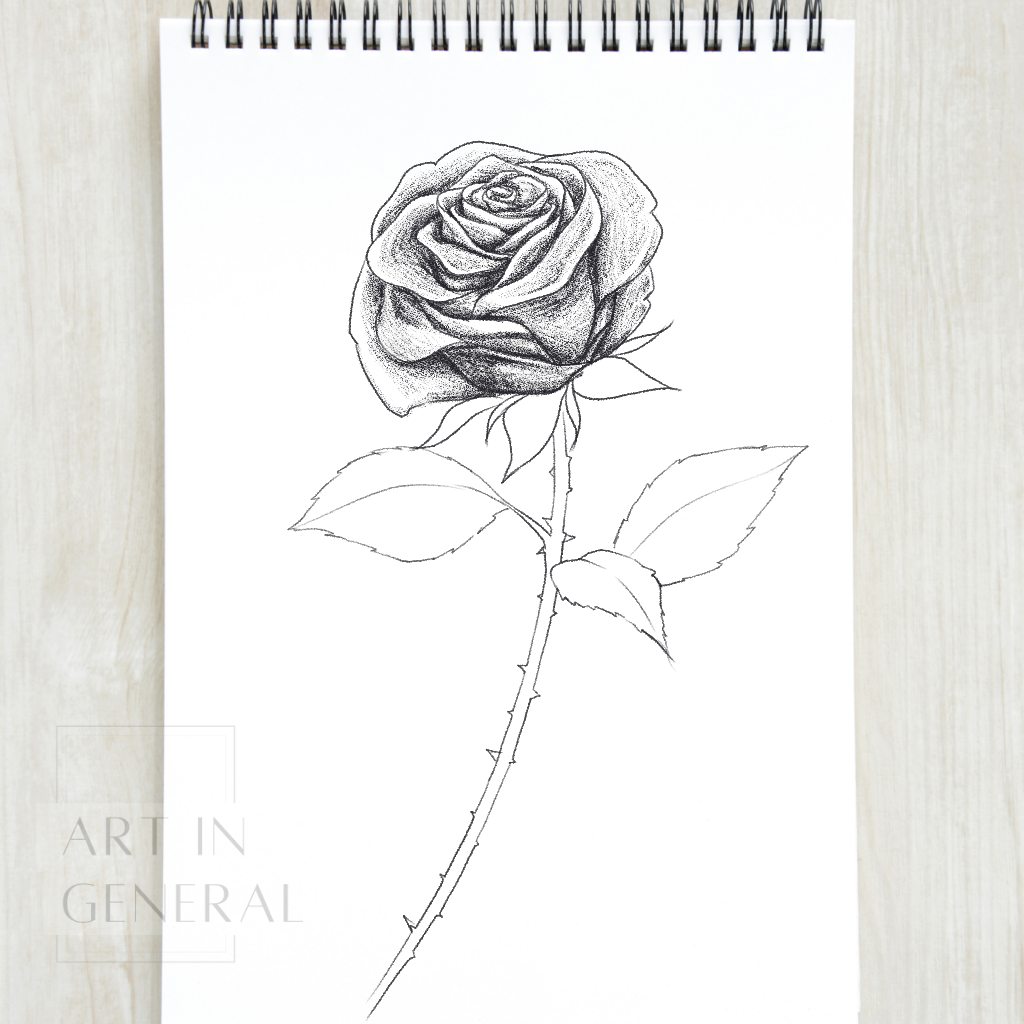
Step 13 — Add contrast with your darker pencils
Deepen the shadows where the petals overlap each other to give the illusion of volume and depth.
Step 14 — Shade the stem and sepals
Shade the sepals and add a base layer of graphite to the stem.
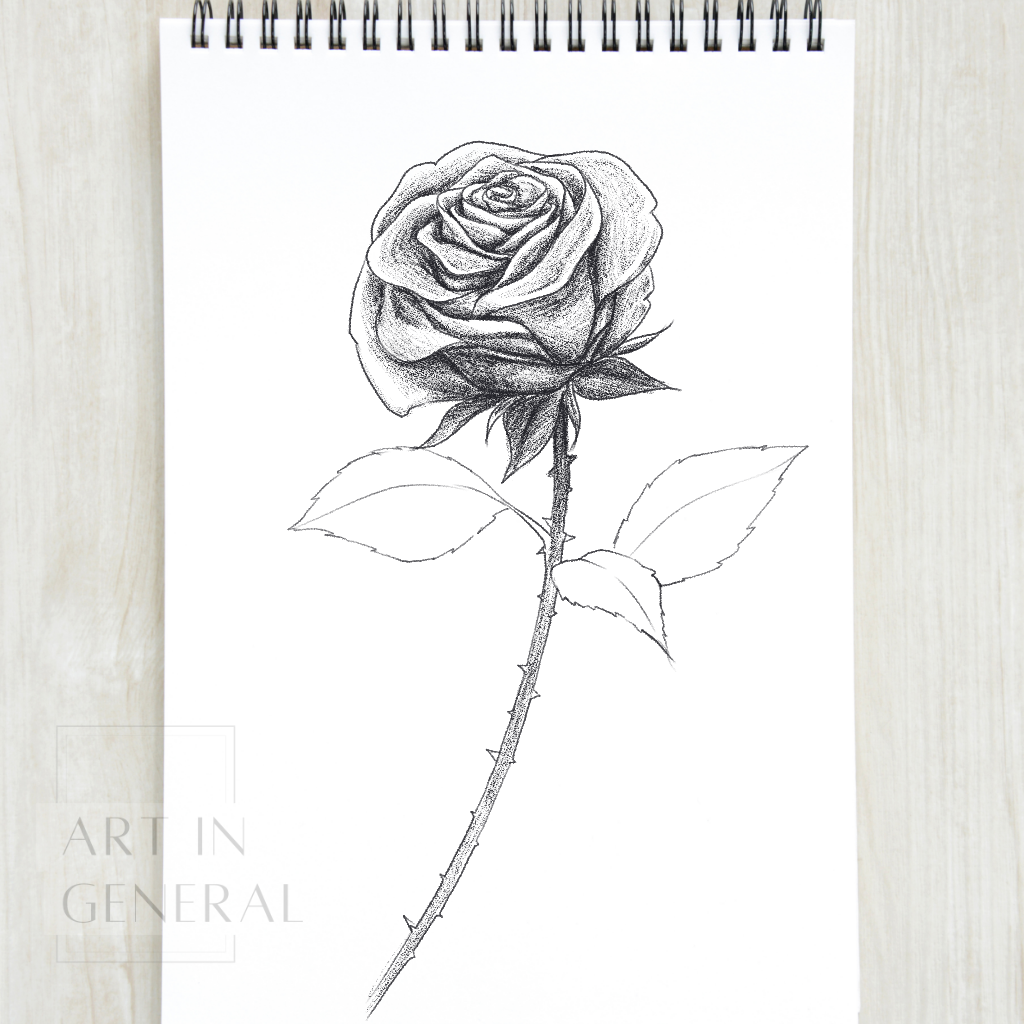
Shade the stem and the thorns.
Step 15 — Shade the leaves
Shade the leaves of your rose following their veins’ pattern with your pencil.


Leave a Reply