

There is quite nothing like having your own space to make art at home, however finding the space that meets the right conditions and that feels comfortable at the same time is a bit of a challenge. That’s why in this article we’re going to guide you in the process of making your own art studio at home. We’re going to cover the essentials, from proper illumination to effective organization and then delve into the specifics for every medium, style and aesthetic.
So don’t worry, whether you’re a seasoned artist or a beginner in the art world, this guide will help you set the perfect space to enhance your creativity. Let’s get started.
1. Choosing the Right Space

Making an art studio at home always begins with choosing the right space, whether you have a small nook or a large room to your disposal, a place where you feel comfortable enough to create and where you can work undisturbed can significantly enhance your creativity and focus.
Consider the Medium You Work WIth
Start by considering the medium or mediums you’ll be working with.
- If you’re a painter, then a well illuminated and well ventilated space is a must. Also consider a place that is easy to clean, or that you don’t mind staining or getting dirty.
- If you’re a sculptor, a place with which ceilings and a sturdy floor would be optimal.
- If you’re a digital artist, a space with little natural light would work better to avoid screen glare, but make sure to pick a place with enough power outlets for your devices and tech equipment.
Consider Natural Light and Ventilation
Natural Light is always a valuable asset, especially for traditional artists so try to look for a space with good exposure to natural light, preferably north-facing to avoid harsh shadows cast by direct sunlight. IF you’re working with mediums like oils or acrylics, choose a space that can be easily ventilated, either through windows or an exhaust system.
Small Space Solutions
Don’t let a small home discourage you. Even a little corner can be transformed into a functional art studio. Use foldable or multipurpose furniture to maximize space. Consider wall-mounted easels and drop-down desks that can be folded away when not in use, mirrors can also be used to make the space feel larger and more illuminated.
2. Furniture and Equipment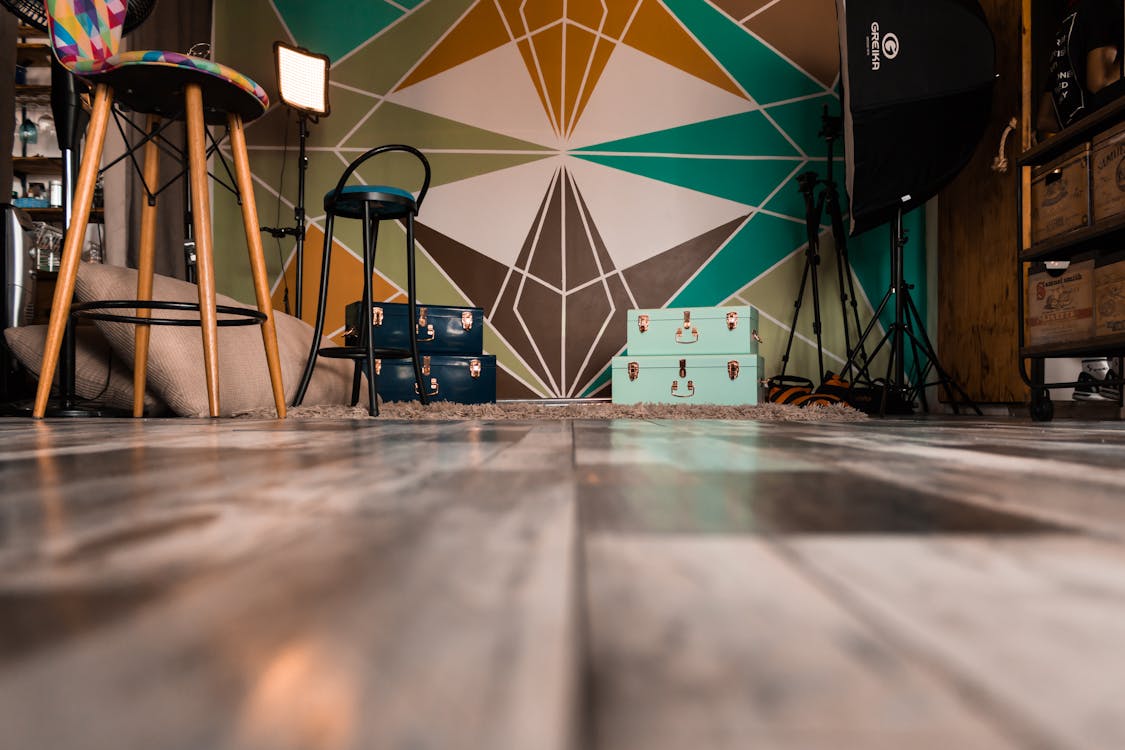
The right furniture is essential to create a functional and comfortable space to work in, from the desk or work table you choose to the storage options you go for. Let’s see what’ll fit your space and style the best:
The Essentials
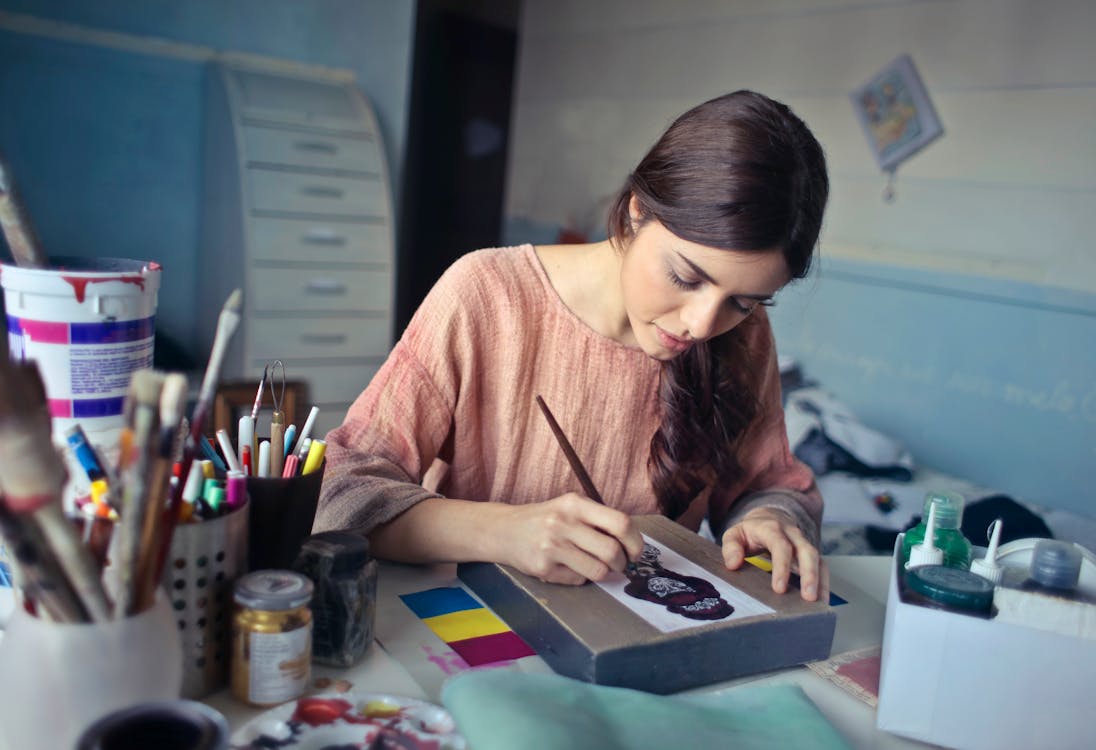
- Desks and Tables: Choose a desk or table that suits the scale of your artwork. Adjustable height desks are ideal for artists who alternate between sitting and standing. For painters and sculptors, a sturdy table that can withstand weight and potential spills is crucial.
- Chairs and Stools: Invest in an ergonomic chair that supports long hours of work without causing discomfort. Stools that can be adjusted to different heights are also beneficial, especially for artists who work on large canvases or sculptures.
- Easels: Pick an easel that fits your style of work. A versatile easel that can adjust to different angles and heights is perfect for artists who work in various mediums. For digital artists, a sturdy desk with a tablet stand or an arm mount can be equally important.
Storage Solutions
- Shelves and Cabinets: Utilize vertical space with shelving units for organizing art supplies and finished works. Cabinets with doors can help protect materials from dust and light exposure.
- Art Carts: Art carts provide mobile storage and can be moved around as you work in different areas of your studio. They are perfect for storing commonly used tools and materials.
- Tool Organizers: Consider using tool organizers typically used in workshops; they’re great for storing brushes, cutters, and other small tools. This keeps your most frequently used items organized and within easy reach.
Lighting Fixtures
- Task Lighting: Good lighting is crucial. Adjustable task lamps allow you to direct light exactly where you need it, which is particularly important for desk or easel work.
- Overhead Lighting: Install overhead lighting that illuminates the entire studio evenly. Opt for daylight bulbs to mimic natural light, which is softer on the eyes and provides excellent color accuracy.
- Accent Lighting: Use accent lighting to highlight specific areas or works-in-progress. This not only enhances the aesthetic of your studio but also helps in examining the textures and details of your artwork.
3. Organizing Your Art Supplies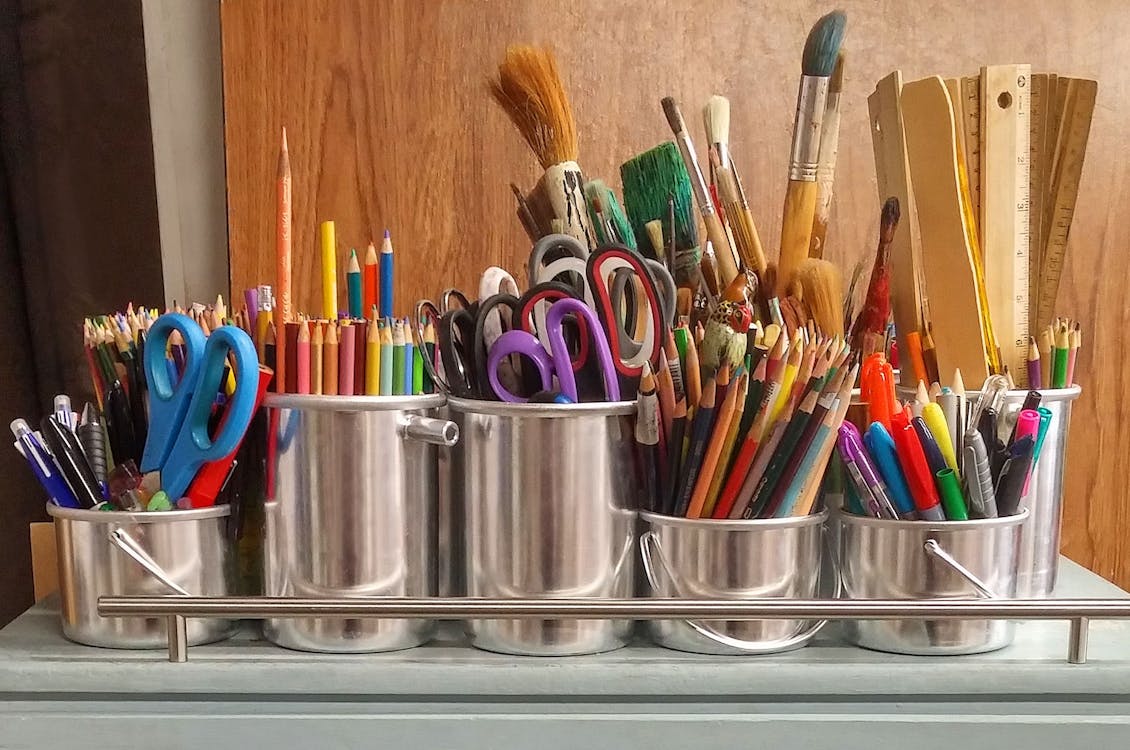
Organizing your art supplies effectively can significantly impact your productivity and creativity. A well-organized studio ensures that you can find what you need quickly and keeps your focus on creating art. Here are some tips and strategies for organizing various types of art materials in your home studio:
- Categorization: Start by categorizing your supplies by type—paints, brushes, canvases, sculpting tools, etc. This makes it easier to find what you need and keeps similar items together.
- Labeling: Use labels to mark shelves, bins, and drawers. Labeling not only helps in identifying items quickly but also aids in maintaining organization over time.
- Vertical Storage: Utilize vertical space for storage to save floor space. Wall-mounted racks for canvases and papers, hanging organizers for tools, and pegboards for accessories can all increase the efficiency of your space.
- Repurposed Furniture: Old bookshelves, kitchen cabinets, and even spice racks can be repurposed to store art supplies. With a bit of creativity, almost any piece of furniture can be adapted for studio use.
- Customized Inserts: For drawers and boxes, create customized inserts that fit your specific tools and materials. Foam inserts can be cut to size for delicate items, while wooden dividers can organize brushes and pencils.
- Magnetic Strips: Install magnetic strips to hold metal tools such as scissors, palette knives, and other metallic items. This keeps them out of the way yet easily accessible.
4. Adding Creative and Functional Touches
Creating an inspiring environment in your home art studio is essential not only for artistic productivity but also for your physical and mental well-being. Here are some key considerations for setting up a work-friendly space:
Importance of Ergonomics
- Ergonomic Furniture: Invest in an ergonomic chair that supports your back during long hours of work. Adjustable chairs and desks can help maintain a healthy posture and prevent strain or injury.
- Proper Height Arrangements: Ensure that your work surface is at the right height. For painting or drawing, the surface should allow you to work comfortably without having to hunch over. Sculptors might prefer a higher table to avoid bending down constantly.
Decor and Style
- Personal Touches: Decorate your studio with items that inspire you, such as art prints, inspirational quotes, or even a small collection of objects that spark creativity. The aesthetic should be something that makes you feel energized and eager to create.
- Color Scheme: Choose colors for your walls and decorations that stimulate creativity. Some artists prefer calm, neutral colors to keep their minds clear, while others may opt for vibrant colors to energize their space.
- Natural Elements: Incorporating plants or having a view of the outdoors can enhance creativity and reduce stress. If windows are limited, high-quality artificial lighting that mimics natural light can also be effective.
Conclusions
Creating an art studio at home is a rewarding endeavor that can transform your artistic practice. By carefully choosing the right space, designing it to suit your specific needs, and organizing it effectively, you establish a sanctuary that nurtures creativity and productivity. Remember, the key steps involve selecting a suitable location, customizing the layout and storage to fit your art medium, equipping the space with the right furniture and lighting, and maintaining an environment that is both inspiring and ergonomically sound.
Embrace the flexibility to adapt these ideas to match your unique style and preferences. Whether your studio is a small corner of a room or a dedicated space, what’s most important is that it supports your creative journey. Keep refining your space as your art evolves, and allow your studio to be a reflection of your artistic journey.
Feel inspired every time you enter your space, ready to create and explore the bounds of your creativity. And remember, the perfect art studio isn’t just about aesthetics—it’s a functional space that meets your artistic needs, helping you to consistently produce your best work.


Leave a Reply