

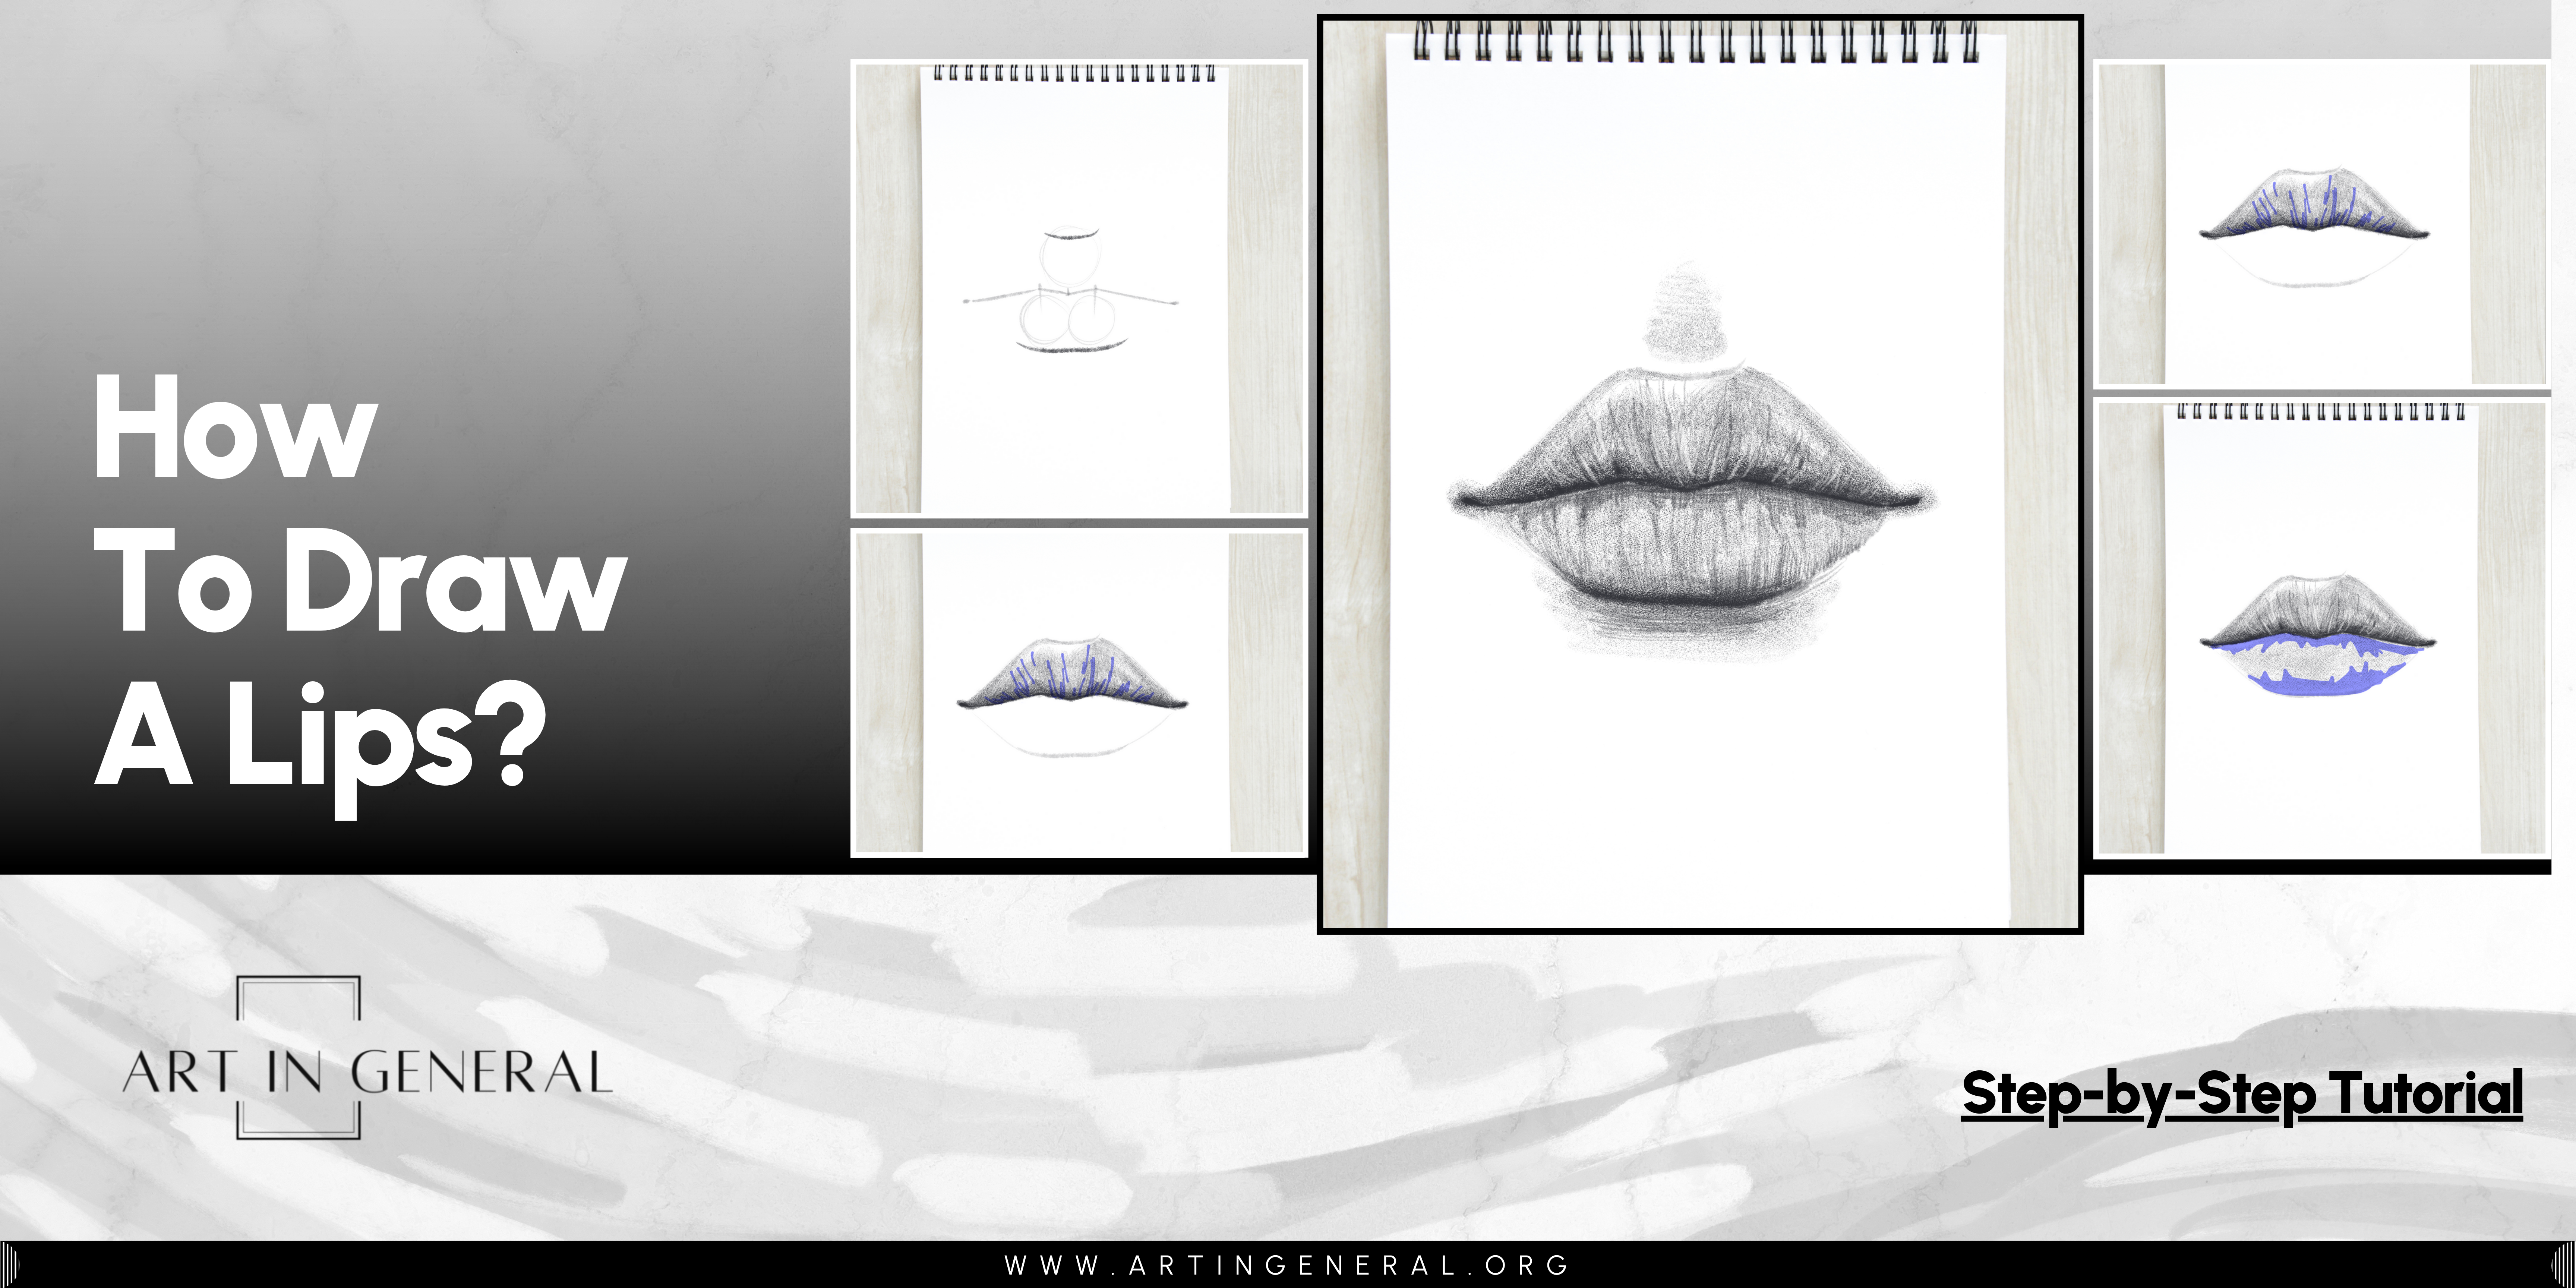
Who hasn’t been captivated by those intricate drawings of stunning lips, filled with detail, and thought, “Wow, I wish I could create that”? Well, your wish is about to come true. Despite what it may seem, drawing lips is simpler than you’d imagine. Stripping away the complex anatomy, sketching a beautiful pair of lips can boil down to several straightforward steps. So, if you’re in search of a user-friendly guide that leads to drawing a realistic pair of lips, you’ve found the right place.
This guide is crafted with beginners in mind, breaking down the process into manageable segments that anyone can follow. We’ll start with the basics, outlining the general shape and form, before delving into the subtleties of shadow, light, and texture that give the lips their lifelike appearance. Each step is explained clearly, ensuring you understand the why and how behind every line you draw. By the end, not only will you have mastered the art of drawing lips, but you’ll also gain confidence in your drawing skills overall.
Let’s get started!
Materials Needed
For this tutorial you’ll need:
- An HB Pencil
- A 2B Pencil
- A 4B Pencil
- A Piece of Paper or a Sketchbook
- A Kneaded Eraser
- A Normal Eraser
Lips Drawing Process
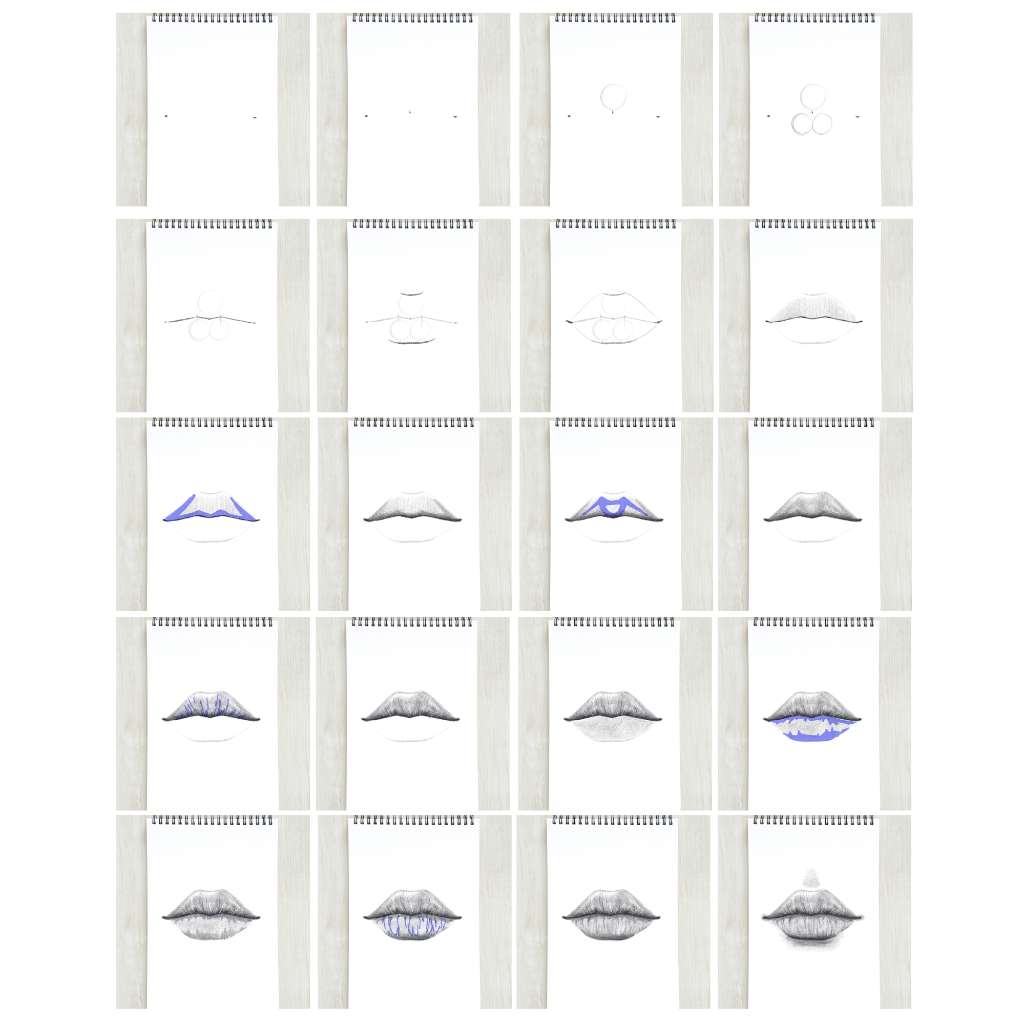
How To Draw Lips Step-by-Step
Step 1 — Draw Two Dots


Draw two dots of the size you want your mouth to have.
Step 2 — Find the Middle
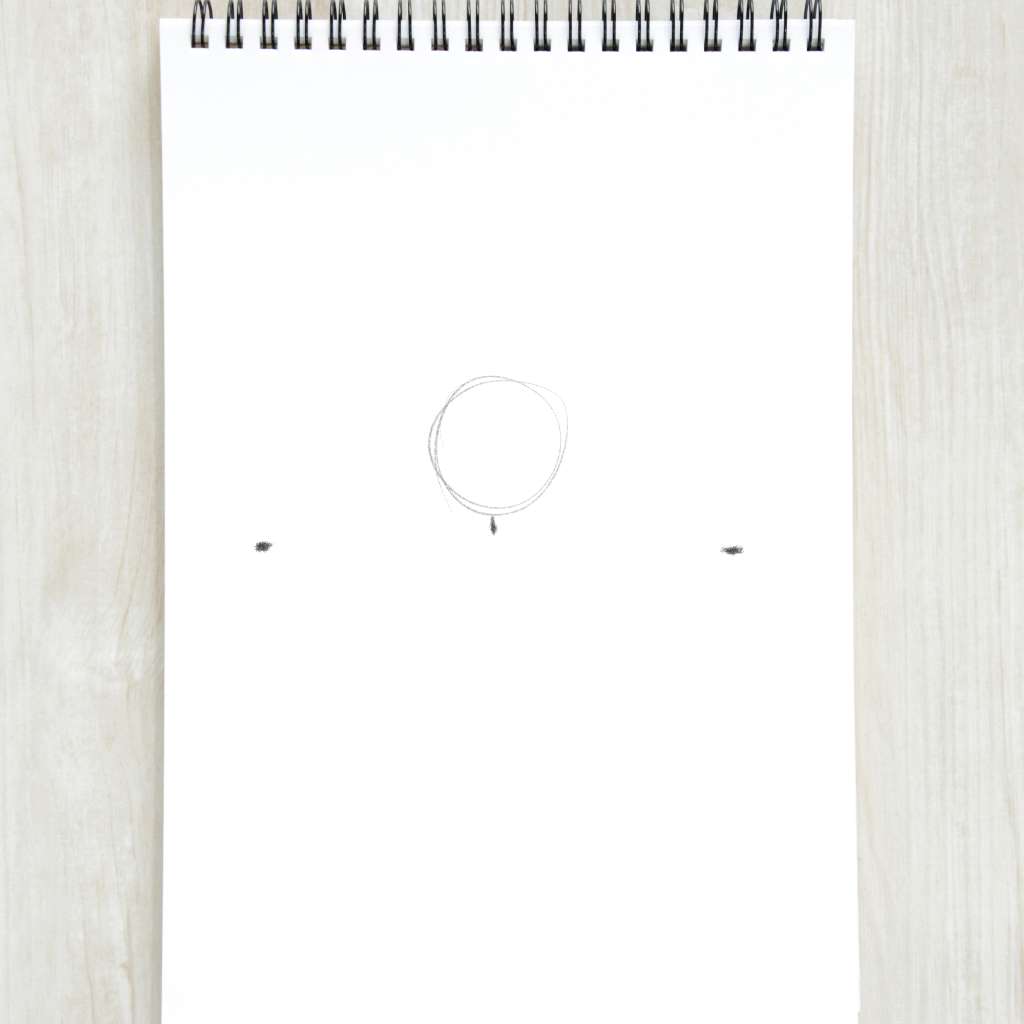
Find the middle of those two dots we drew in step 1 and draw a circle on top of it.
Step 3 — Draw Two Circles
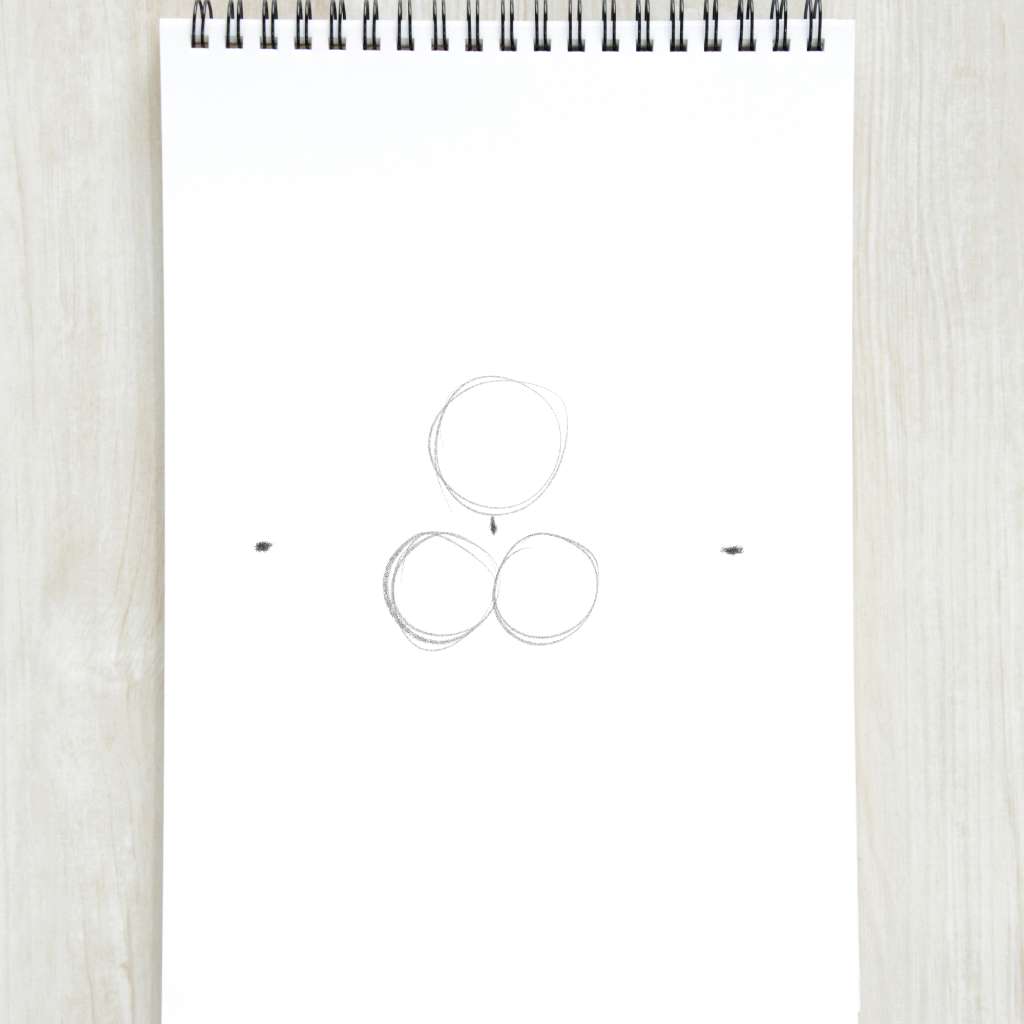
Using the first circle as a reference, draw two slightly smaller circles below.
Step 4 — Draw the Lip Line
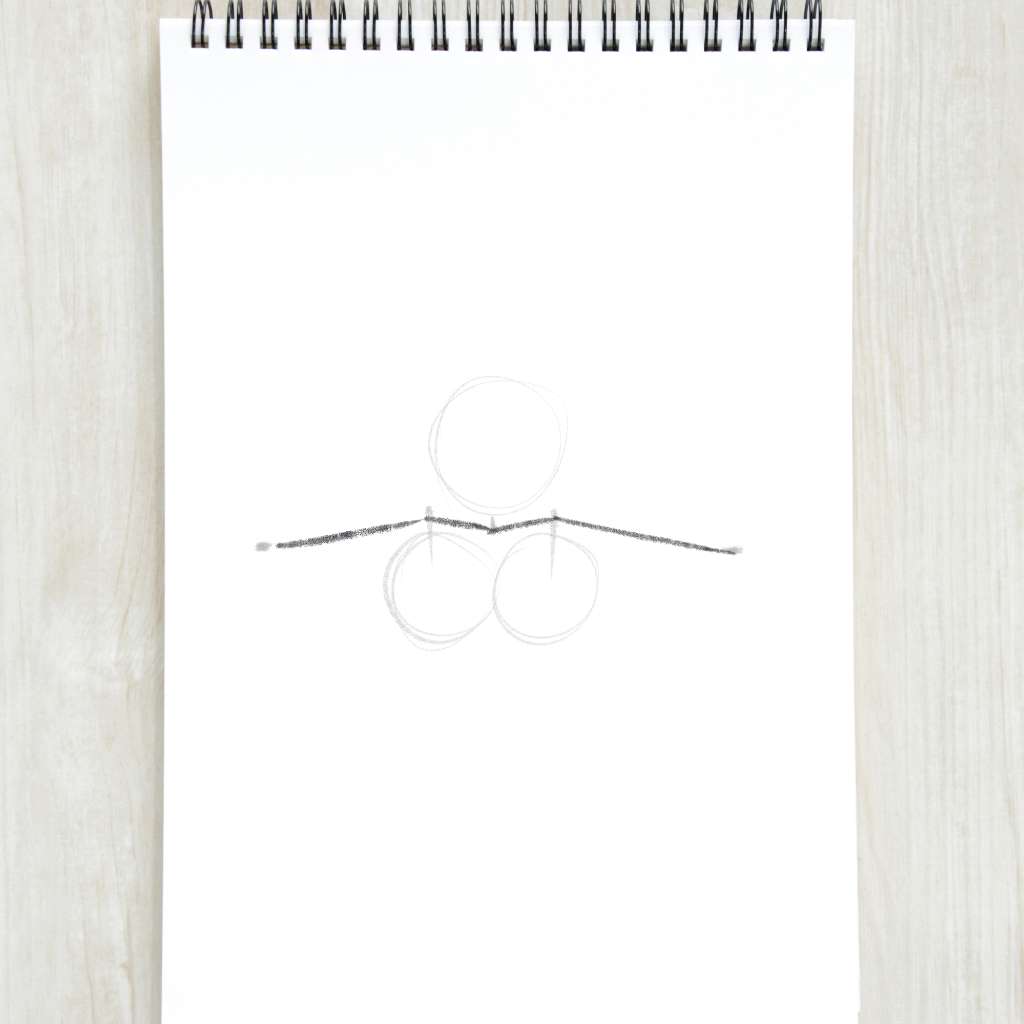
Find the middle of the two circles we drew in the last step and connect them to the corners of the mouth.
Step 5 — Draw two Curved Lines

Draw two curved lines on the top and bottom of the mouth, one cutting the circle on the top and one below the two circles on the bottom.
Step 6 — Complete the Mouth Shape
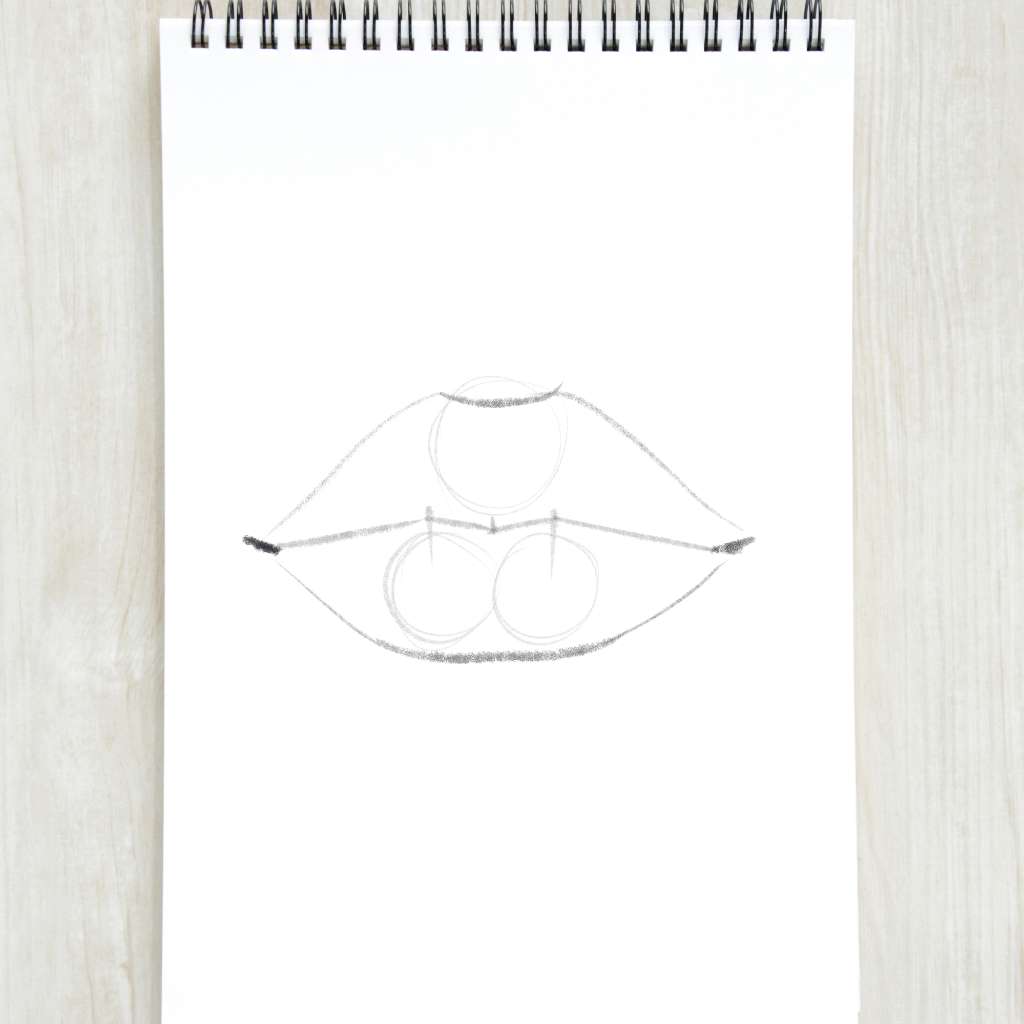
Complete the outline of the mouth and draw two smaller lines on the corners.
Step 7 — Shade the Upper Lip
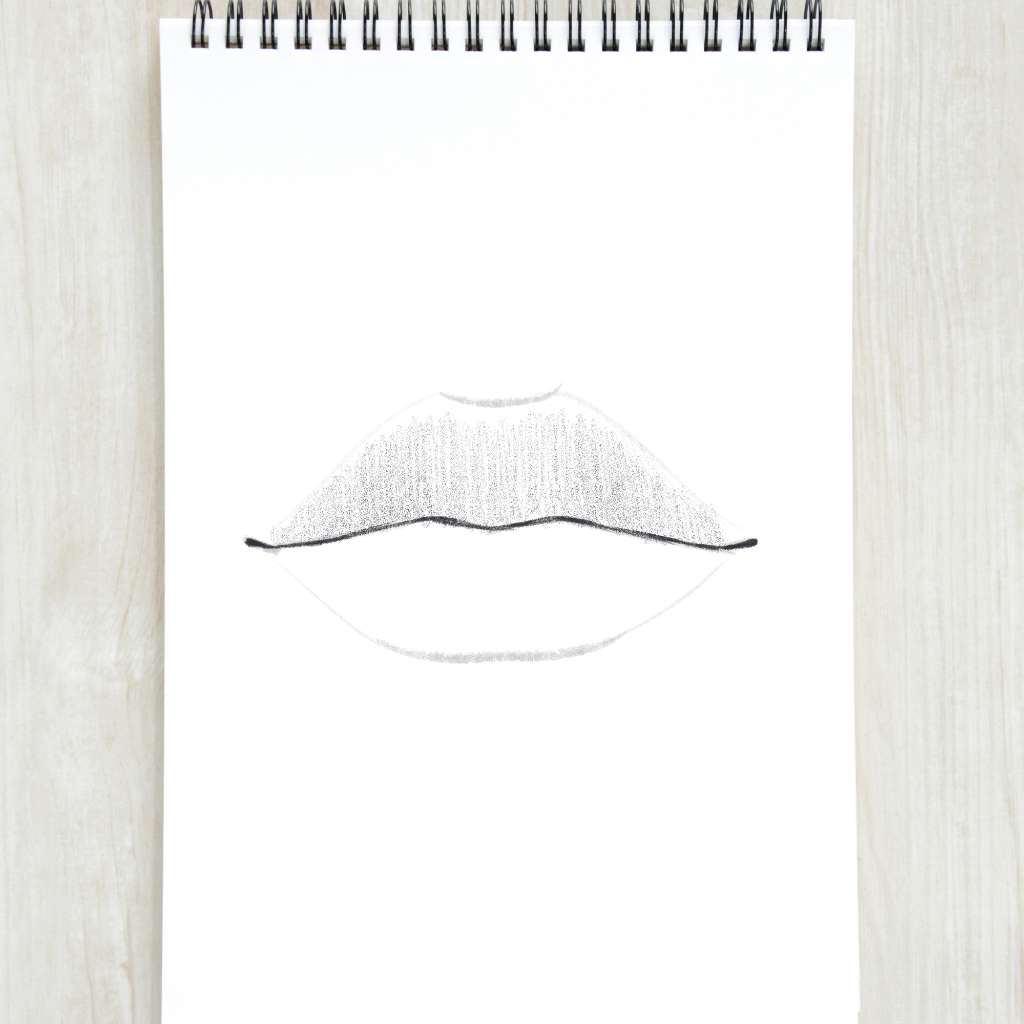
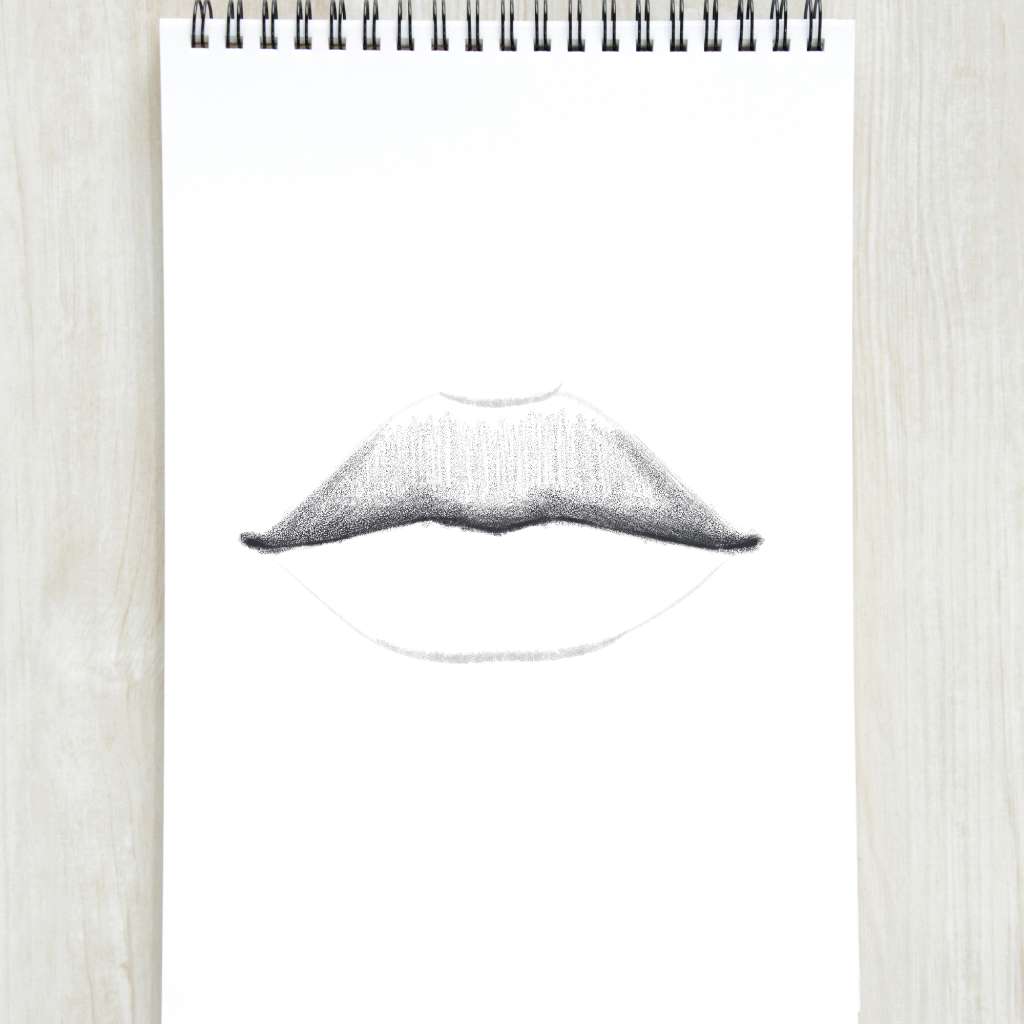
Softly shade the upper lip with vertical movements filling everything uniformly with graphite. Then shade as shown in the diagram to add contrast to the shape of the upper lip.
Step 8 — Shade Some More

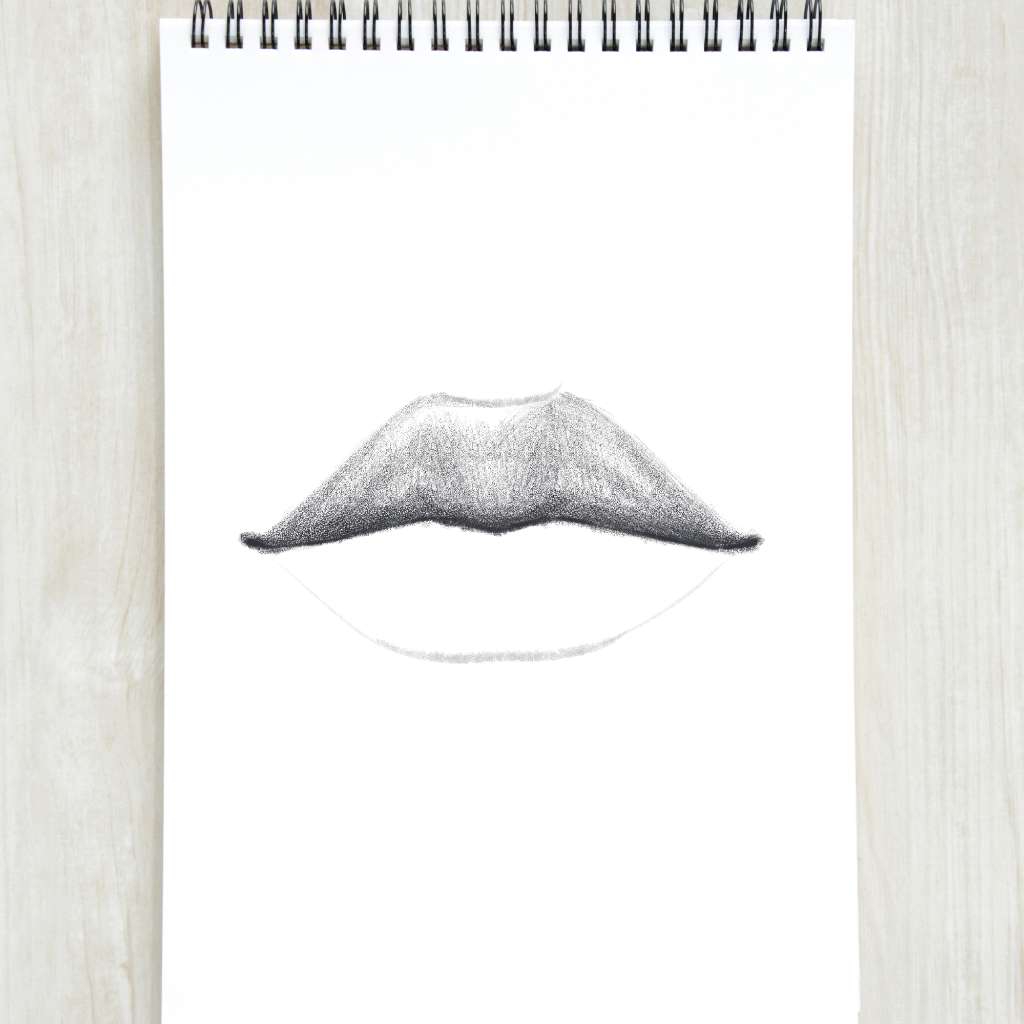
Use the diagram below to add more realistic shadows to the upper lips, shade softly and w also outline the lips a bit.
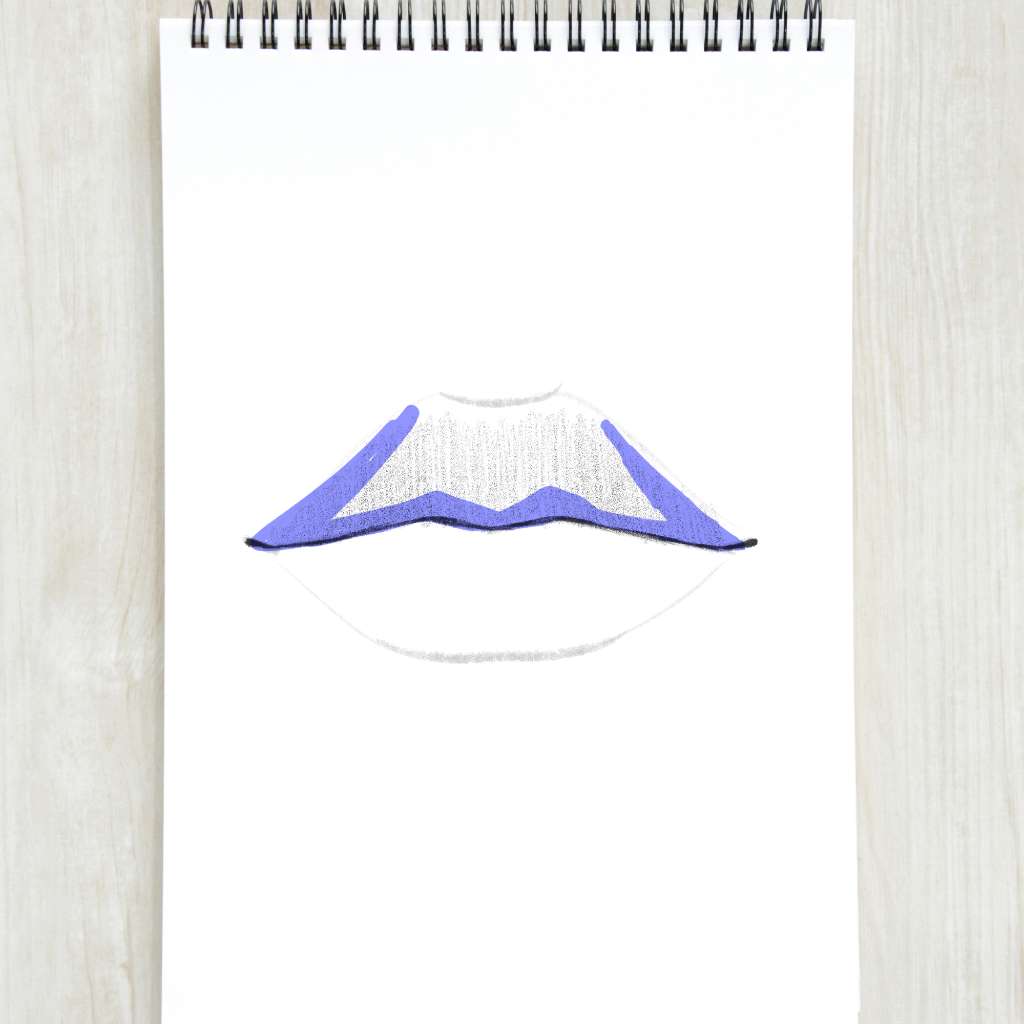
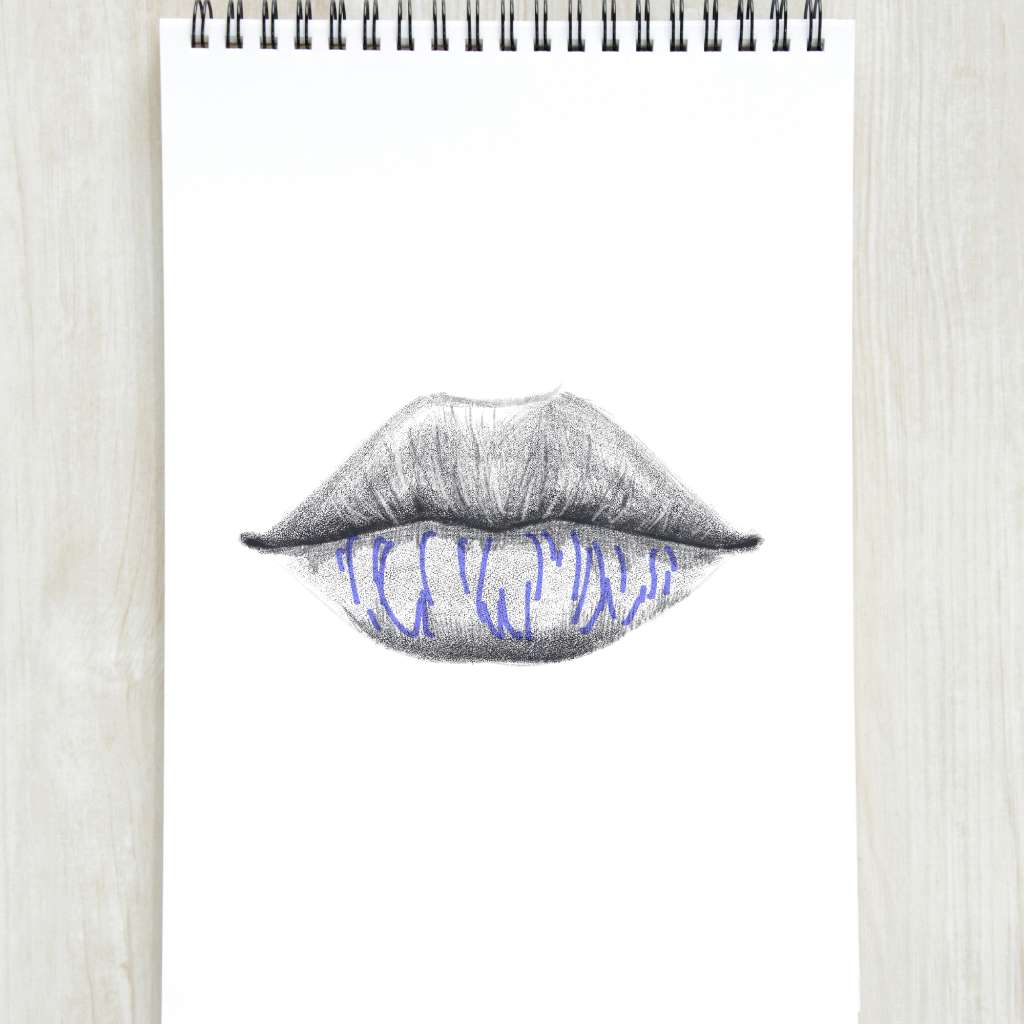
Step 9 — Add Details
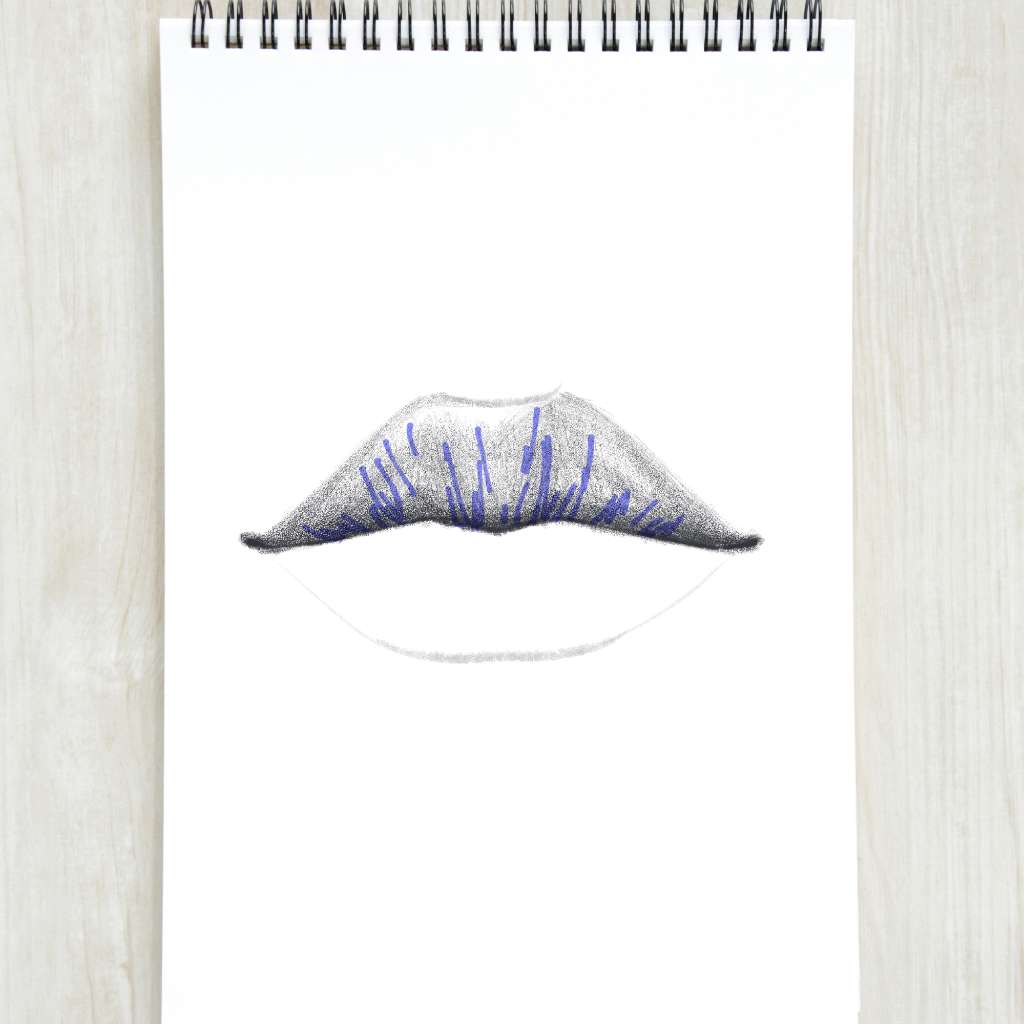
Add some irregular lines coming from the base towards the lips’ borders and using your mono eraser take away some graphite from some of those lines to add realism to your drawing.
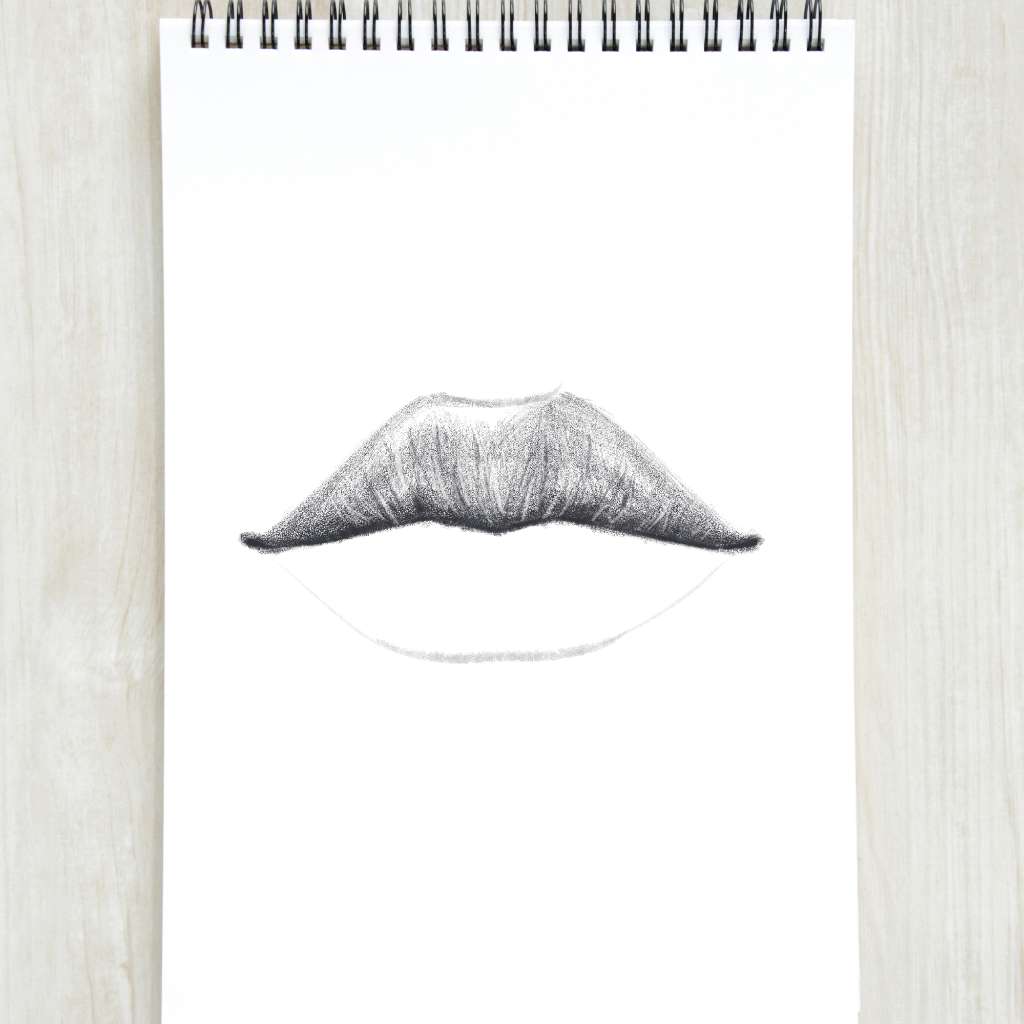
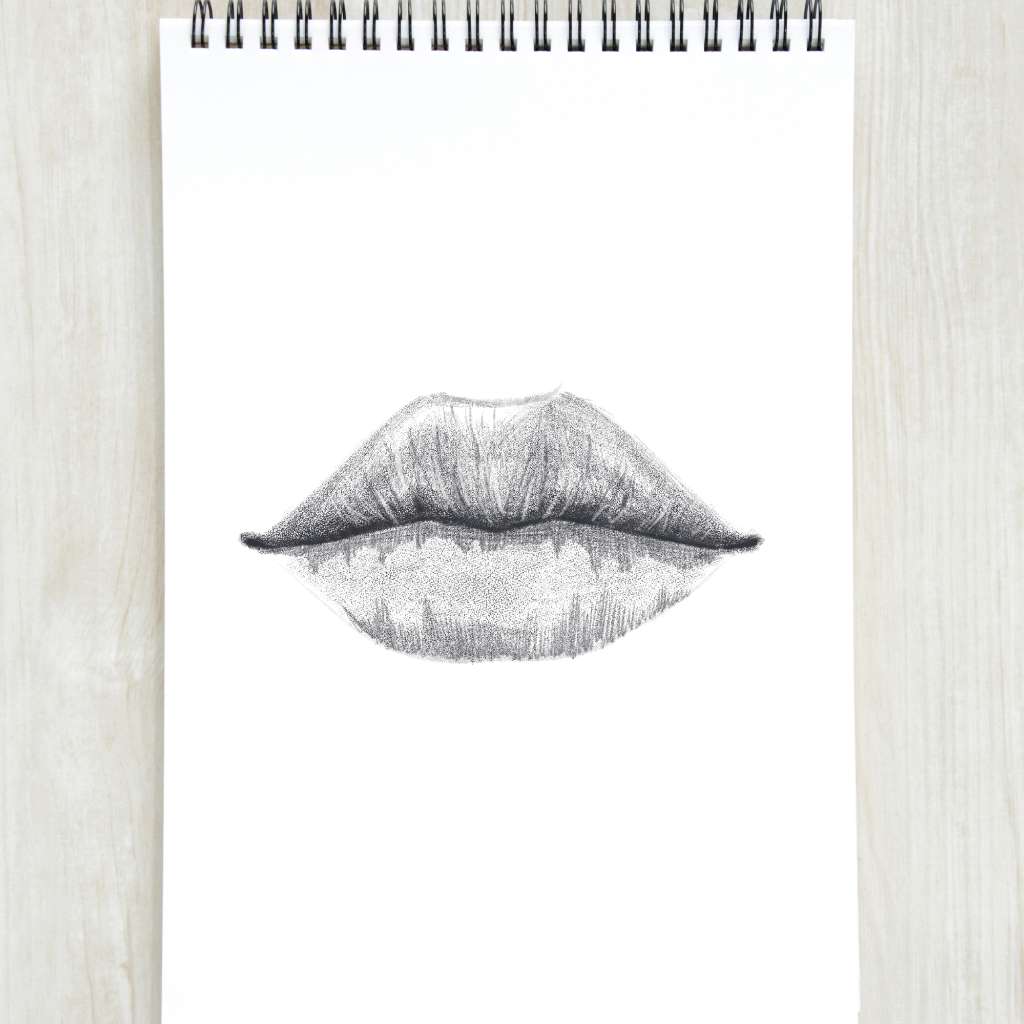
Step 10 — Shade the Bottom Lip
Add some irregular lines coming from the base towards the lips’ borders and using your mono eraser take away some graphite from some of those lines to add realism to your drawing.
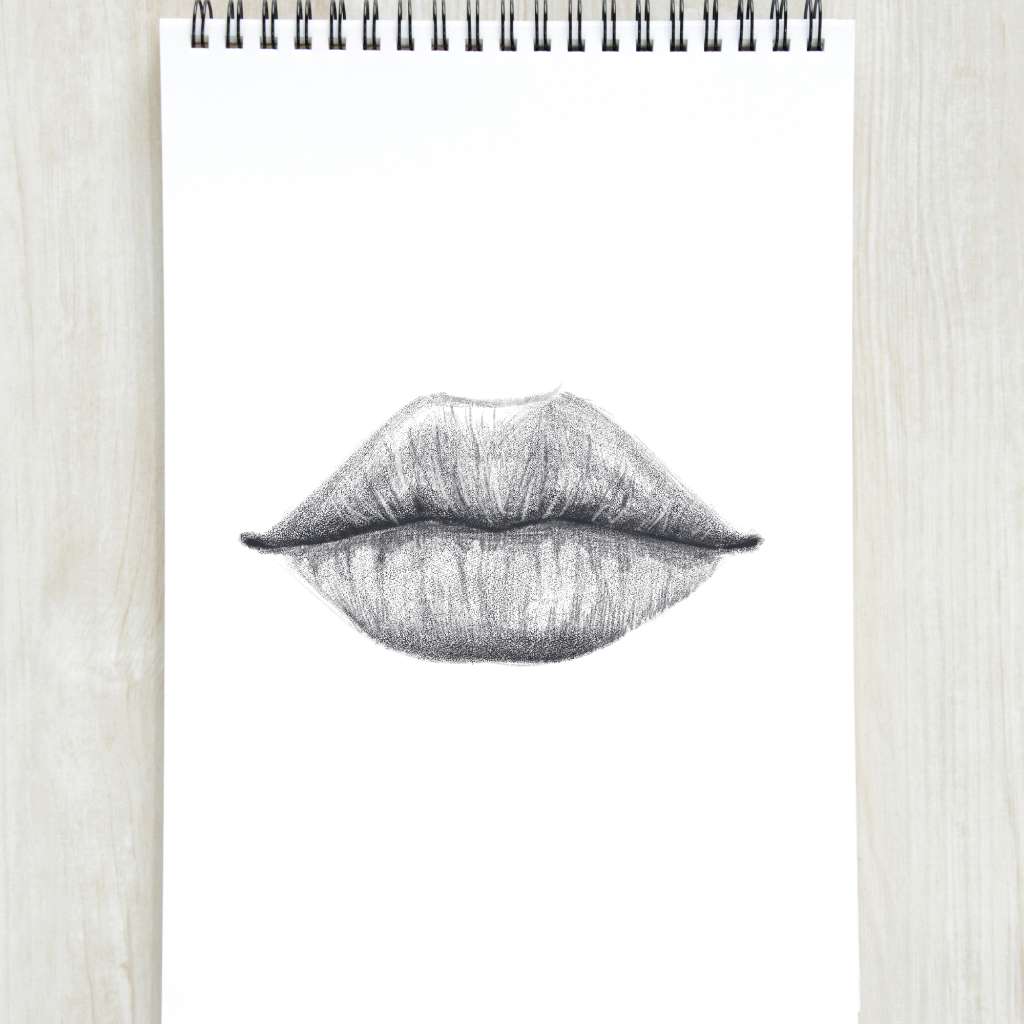
Step 11 — Add More Shadows
Following the diagram below, add some irregular shadows to your lips’ drawing using vertical lines and soft traces.
Step 12 — Shade the Base of the Lips
Shade the base of the lips and then add more irregular lines, this time following the shadows we added in step 10.
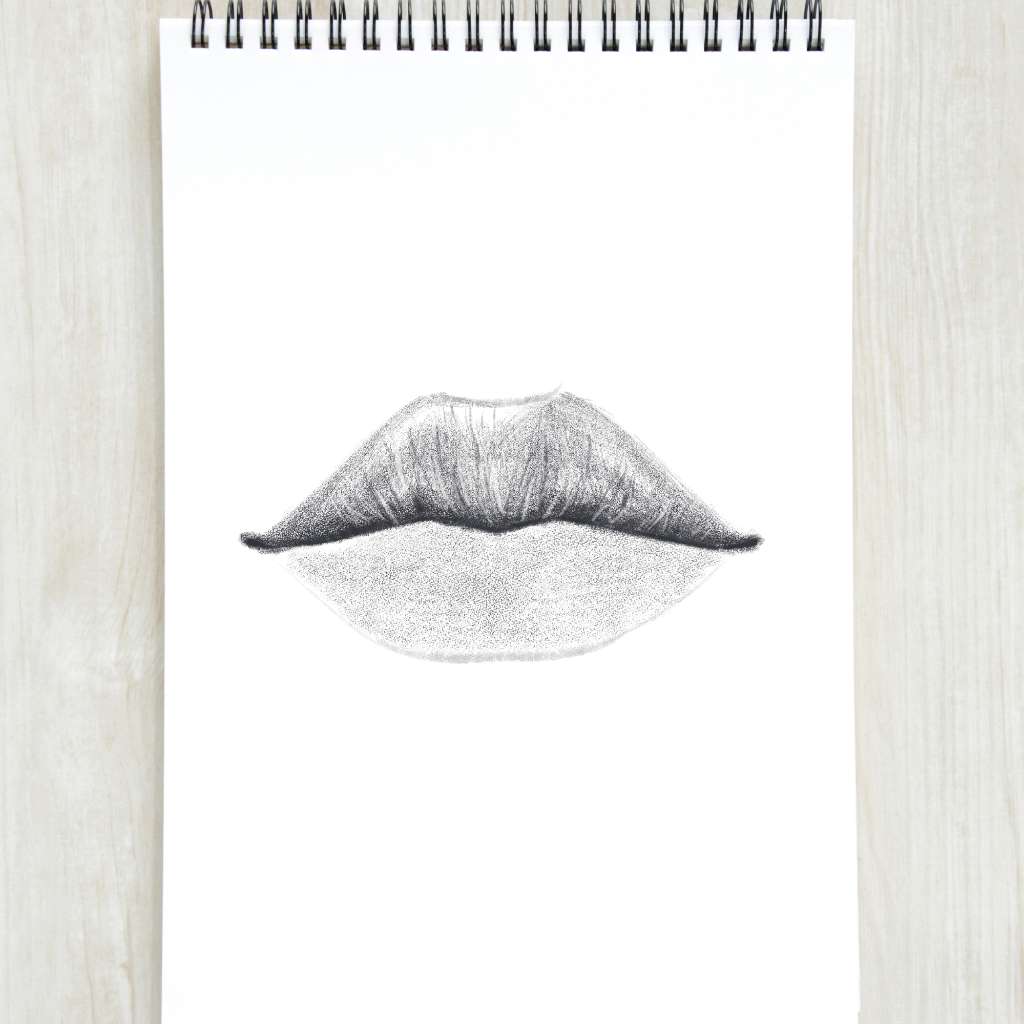
Step 13 — Add More Details
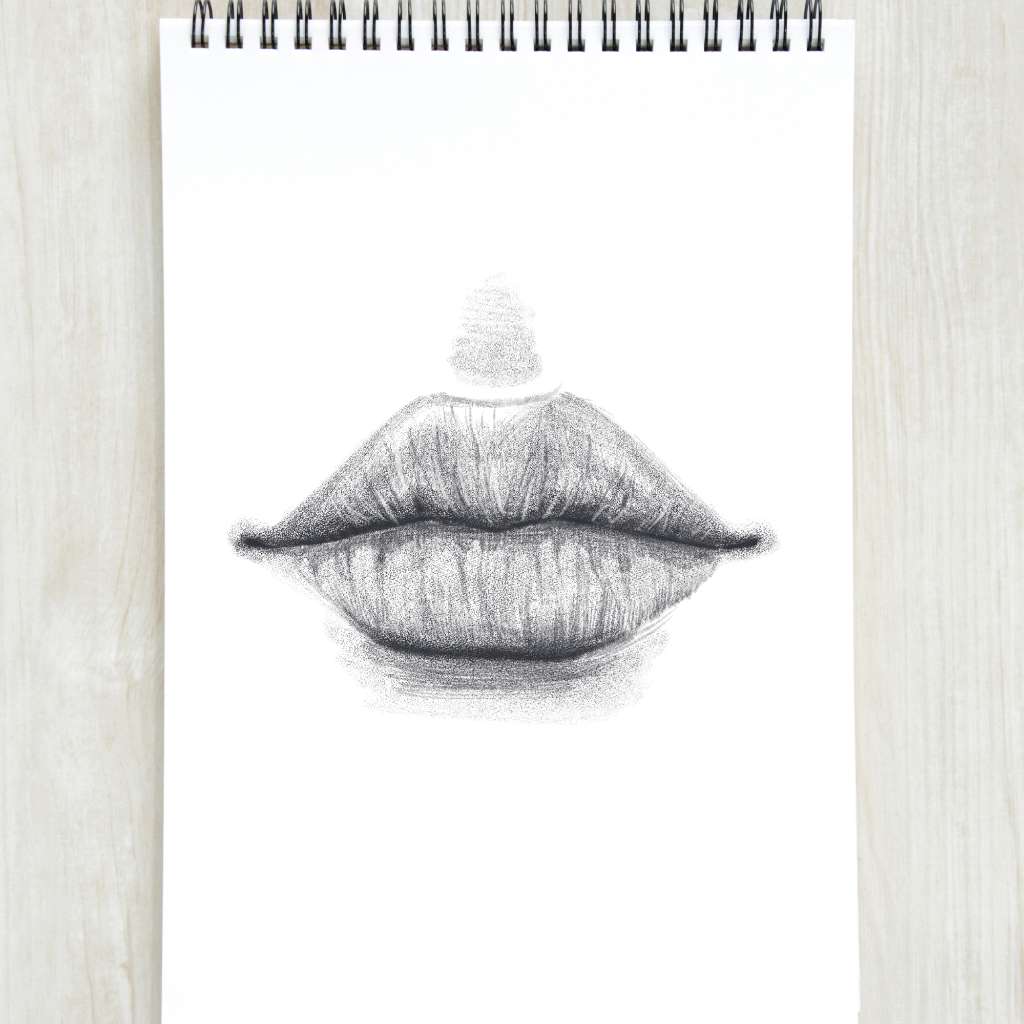
Shade around the corners of the mouth, under the lips, and the cupid’s bow to add a touch of realism to your drawing.
Step 14 — Practice
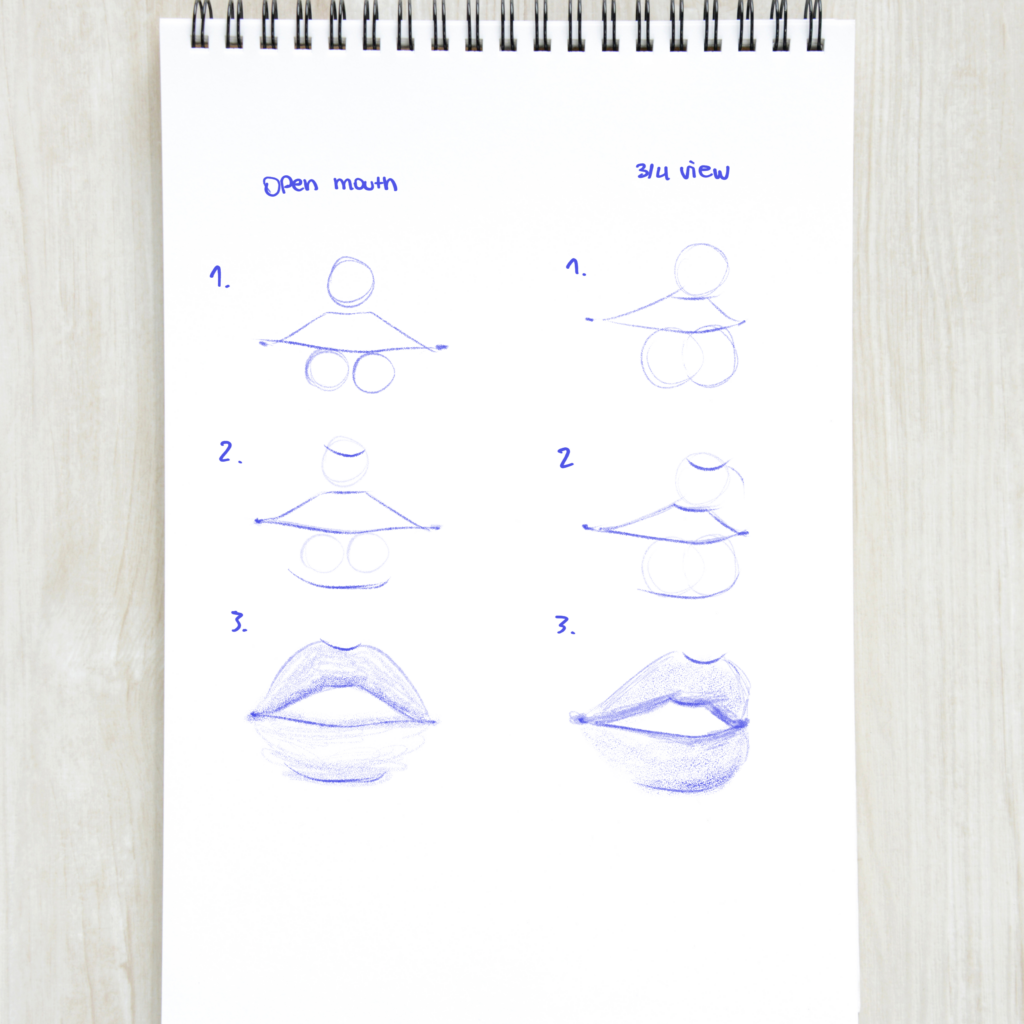 Use the three-balls method to draw the lips in any position and angle, just stretch them, overlap them and use them as a reference for volume and form.


Leave a Reply